Preparing Your Vancouver Roofs for Winter (or Rainy Season) Successfully
Uncover expert, insider roofing tips customized for British Columbia’s unique climate and secure the perfect solution for your home—guaranteed!
Seasonal Maintenance Checklist
We all know the Lower Mainland has its fair share of rain, wind, and the occasional flurry that can leave you stuck in traffic on Highway 1 for what feels like an eternity. I’m Harman here, owner of Paragon Roofing BC, and I’ve seen how winter weather in the Vancouver area can sneak up on a roof if you’re not paying attention. Over the years, I’ve worked on countless projects during the gloomy months when the days are short and the umbrella sales go through the roof (no pun intended). Below is the seasonal maintenance checklist I always recommend:
Check Gutters and Downspouts
Gutters and downspouts might seem about as exciting as waiting in line at the Pattullo Bridge during rush hour, but trust me—they’re essential. If leaves, twigs, or stray tennis balls end up blocking that drainage system, water can’t flow away from your house. It’s not uncommon in Surrey, for example, to see gutters overflowing after a heavy rainstorm. That overflow can cause moisture to seep into the roof’s edges, leading to leaks. I’ve heard plenty of folks say, “I’ll get to it next weekend,” only to find out later they’ve got brown patches on their ceiling. Better to tackle it sooner.
- Tip: Use a sturdy ladder on stable ground. Scoop out debris with a small plastic shovel or gloved hands. Then, flush the gutters with a hose. If you notice water isn’t flowing freely through the downspouts, you might have a clog. One old trick is to use a plumber’s snake if the clog refuses to budge.
- Frequency: Inspect and clean at least twice a year—typically in late fall after most leaves have dropped, and again in early spring.
Remove Debris from Roof Surfaces
Vancouver’s temperate rainforest climate invites plenty of moss, algae, and soggy leaves. Moss in particular can be a real nuisance because it holds moisture against shingles, accelerating deterioration. One time, I was called out to Delta in late November. The homeowner’s garage roof had a thick carpet of moss that trapped water so effectively, it seeped underneath the shingles. With a bit of gentle cleaning, we got rid of it, but it’s something that might have been prevented with routine checks.
- Tip: Sweep off large debris gently—avoid power washing. Too much pressure can damage the granules on asphalt shingles or shift wooden shingles. If you see moss or algae, consider using a specialized cleaning solution labeled safe for roofing materials.
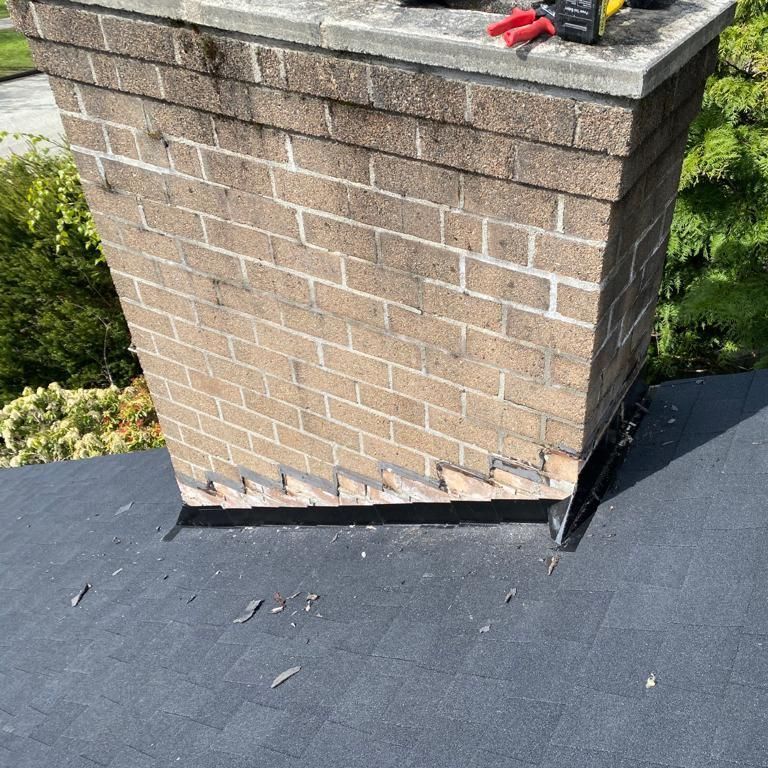
Inspect Flashings, Skylights, and Vents
Flashings around chimneys, skylights, vents, and dormers are your roof’s “seals.” If they’re loose, bent, or rusted, water can slip into even the tiniest cracks. Picture a drippy faucet in the middle of a rainy night—only the faucet is your roof, and you have a bucket in your living room. Not the coziest vibe for a winter evening when you’re trying to watch a Canucks game.
- Tip: Look for dried-out caulk or any sign of rust. A quick patch-up with roofing cement or replacing worn flashing can make a big difference in preventing leaks.
- Warning Sign: Unusual stains or discoloration near your chimney or skylight interior. That’s a typical sign water found a sneaky route inside.
Identify Potential Leak Sources
Even if you don’t see water dripping from your ceiling, there might be early-stage leaks. Sometimes you spot subtle discoloration, faint musty odors, or warped drywall. You might walk into a closet and detect a whiff of mildew. These minor clues can point to bigger issues brewing.
- Tip: Check attic corners and around roof penetrations for signs of moisture or dripping. Keep a flashlight handy and run it along the sheathing. If you spot dark patches or damp wood, you’ll know there’s a leak. If you’re comfortable with a moisture meter, that’s another step in verifying dampness.
Ensure Proper Drainage
In areas like Burnaby or New Westminster, where we can get torrential rain for days, your roof surface needs to shed water efficiently. Ensure the pitch is clear of obstructions—like branches or that random Frisbee your kids lost last summer. Standing water is never a good sign on a sloped roof.
- Tip: After a moderate rain, go outside and see if water is collecting in particular spots. Pools of water might mean the roof’s slope or drainage system needs attention.
The Role of Insulation and Ventilation: Keeping Ice Dams at Bay
Even though Metro Vancouver isn’t the snow capital of Canada, we get our share of slushy, wet snow. It might not pile up for months the way it does in other parts of the country, but we should still talk about insulation and ventilation because these two factors can prevent the dreaded ice dam scenario in colder snaps.
What Are Ice Dams?
An ice dam forms when a portion of your roof’s surface warms up enough to melt snow, but the eaves remain cold, causing that melted water to refreeze along the edges. This creates a barrier (the “dam”) of ice. Water continues to pool behind the ice dam and can back up beneath your shingles. Now you’ve got a leak.
In Vancouver, we might get freeze-thaw cycles, especially in outlying suburban areas or higher elevations, such as parts of Coquitlam or Maple Ridge. And ice dams can still happen if your attic is warm enough to melt snow in the wrong spot.
- Fun Fact: You’d be surprised how minimal the temperature difference has to be to start creating mini-dams. Even a slight bit of heat escaping from your attic can cause enough snow melt to begin the freeze-refreeze cycle.
Ventilation 101
Proper ventilation allows cold air to circulate in the attic. This keeps the roof’s exterior temperature more consistent, making it less likely for snow to melt unevenly. You don’t want a “hot roof,” especially in winter. Warm patches on the underside of your roof can lead to those meltdown drips.
- Tip: Soffit vents draw in fresh air, while ridge vents push out warm, moist air. If you see condensation inside your attic or frost on the nail tips, that’s a big indicator your ventilation system might be lacking.
- Check: Make sure insulation isn’t blocking soffit vents. Sometimes, homeowners push insulation right up against the eaves, stopping airflow.
Choosing the Right Insulation
Insulation is your friend—no doubt about it. But you want adequate coverage without going overboard. Insulating your attic floor helps keep the heat where it belongs: inside your home’s living space. Meanwhile, you don’t want that heat building up against the underside of the roof deck.
- Material: In the Vancouver area, fiberglass batt insulation or blown-in cellulose are common. Some people go with spray foam, but that requires careful installation to avoid moisture traps.
- Recommended R-Value: According to the BC Building Code, for our coastal climate zone, you generally want R-40 to R-50 in the attic. Always check the latest requirements, though, because codes can change. More insulation isn’t always better if it compromises ventilation.
Preventing Warm Air Leakage
Small gaps around light fixtures, attic hatches, or wiring penetrations can let warm air leak into the attic. If that warm air is pushing directly up onto the roof, you risk uneven snow melt.
- Tip: Seal those gaps with caulk or foam sealant. Pay attention around recessed lights, especially older ones not rated for direct contact with insulation.
- Odd Example: I once saw a house in White Rock where the living room pot lights were venting a surprising amount of hot air straight into the attic. The temperature difference in those small pockets was enough to create a few ice dams that winter. Sealing them solved the issue.
Common Winter-Related Issues in Vancouver
Winter here in the Lower Mainland isn’t always about massive snow drifts. More often, it’s that chilly, wet, can’t-stop-raining vibe that can test any roof’s endurance. Let’s go through some of the most common winter-related issues I’ve encountered.
Mold and Mildew
Dampness is pretty much inescapable in our region, especially from November through March. If water sneaks into your attic or between your roof layers, mold can set up shop. It might start subtly—first you notice a hint of musty odor, then you realize there’s blackish or greenish spots on the plywood.
- Health Concern: Mold spores can aggravate allergies or respiratory issues. You don’t want that.
- Prevention: Keep moisture out to begin with. That means sealing leaks, maintaining good ventilation, and avoiding extended periods of high humidity in your attic or crawl spaces.
Persistent Leaks
We Vancouverites (and folks in Surrey, Delta, Richmond, and beyond) experience near-constant drizzle for days. Even minor vulnerabilities in roof valleys or around vents become a big problem when water is dripping non-stop.
- Symptom: Water stains on your ceiling, peeling paint, or even a small puddle on your windowsill.
- Diagnosis: Trace the stain’s highest point in the attic. Water can travel horizontally along rafters or insulation, making the source tricky to find. If you’re not comfortable diagnosing it yourself, it’s often worth having a thorough roof inspection.
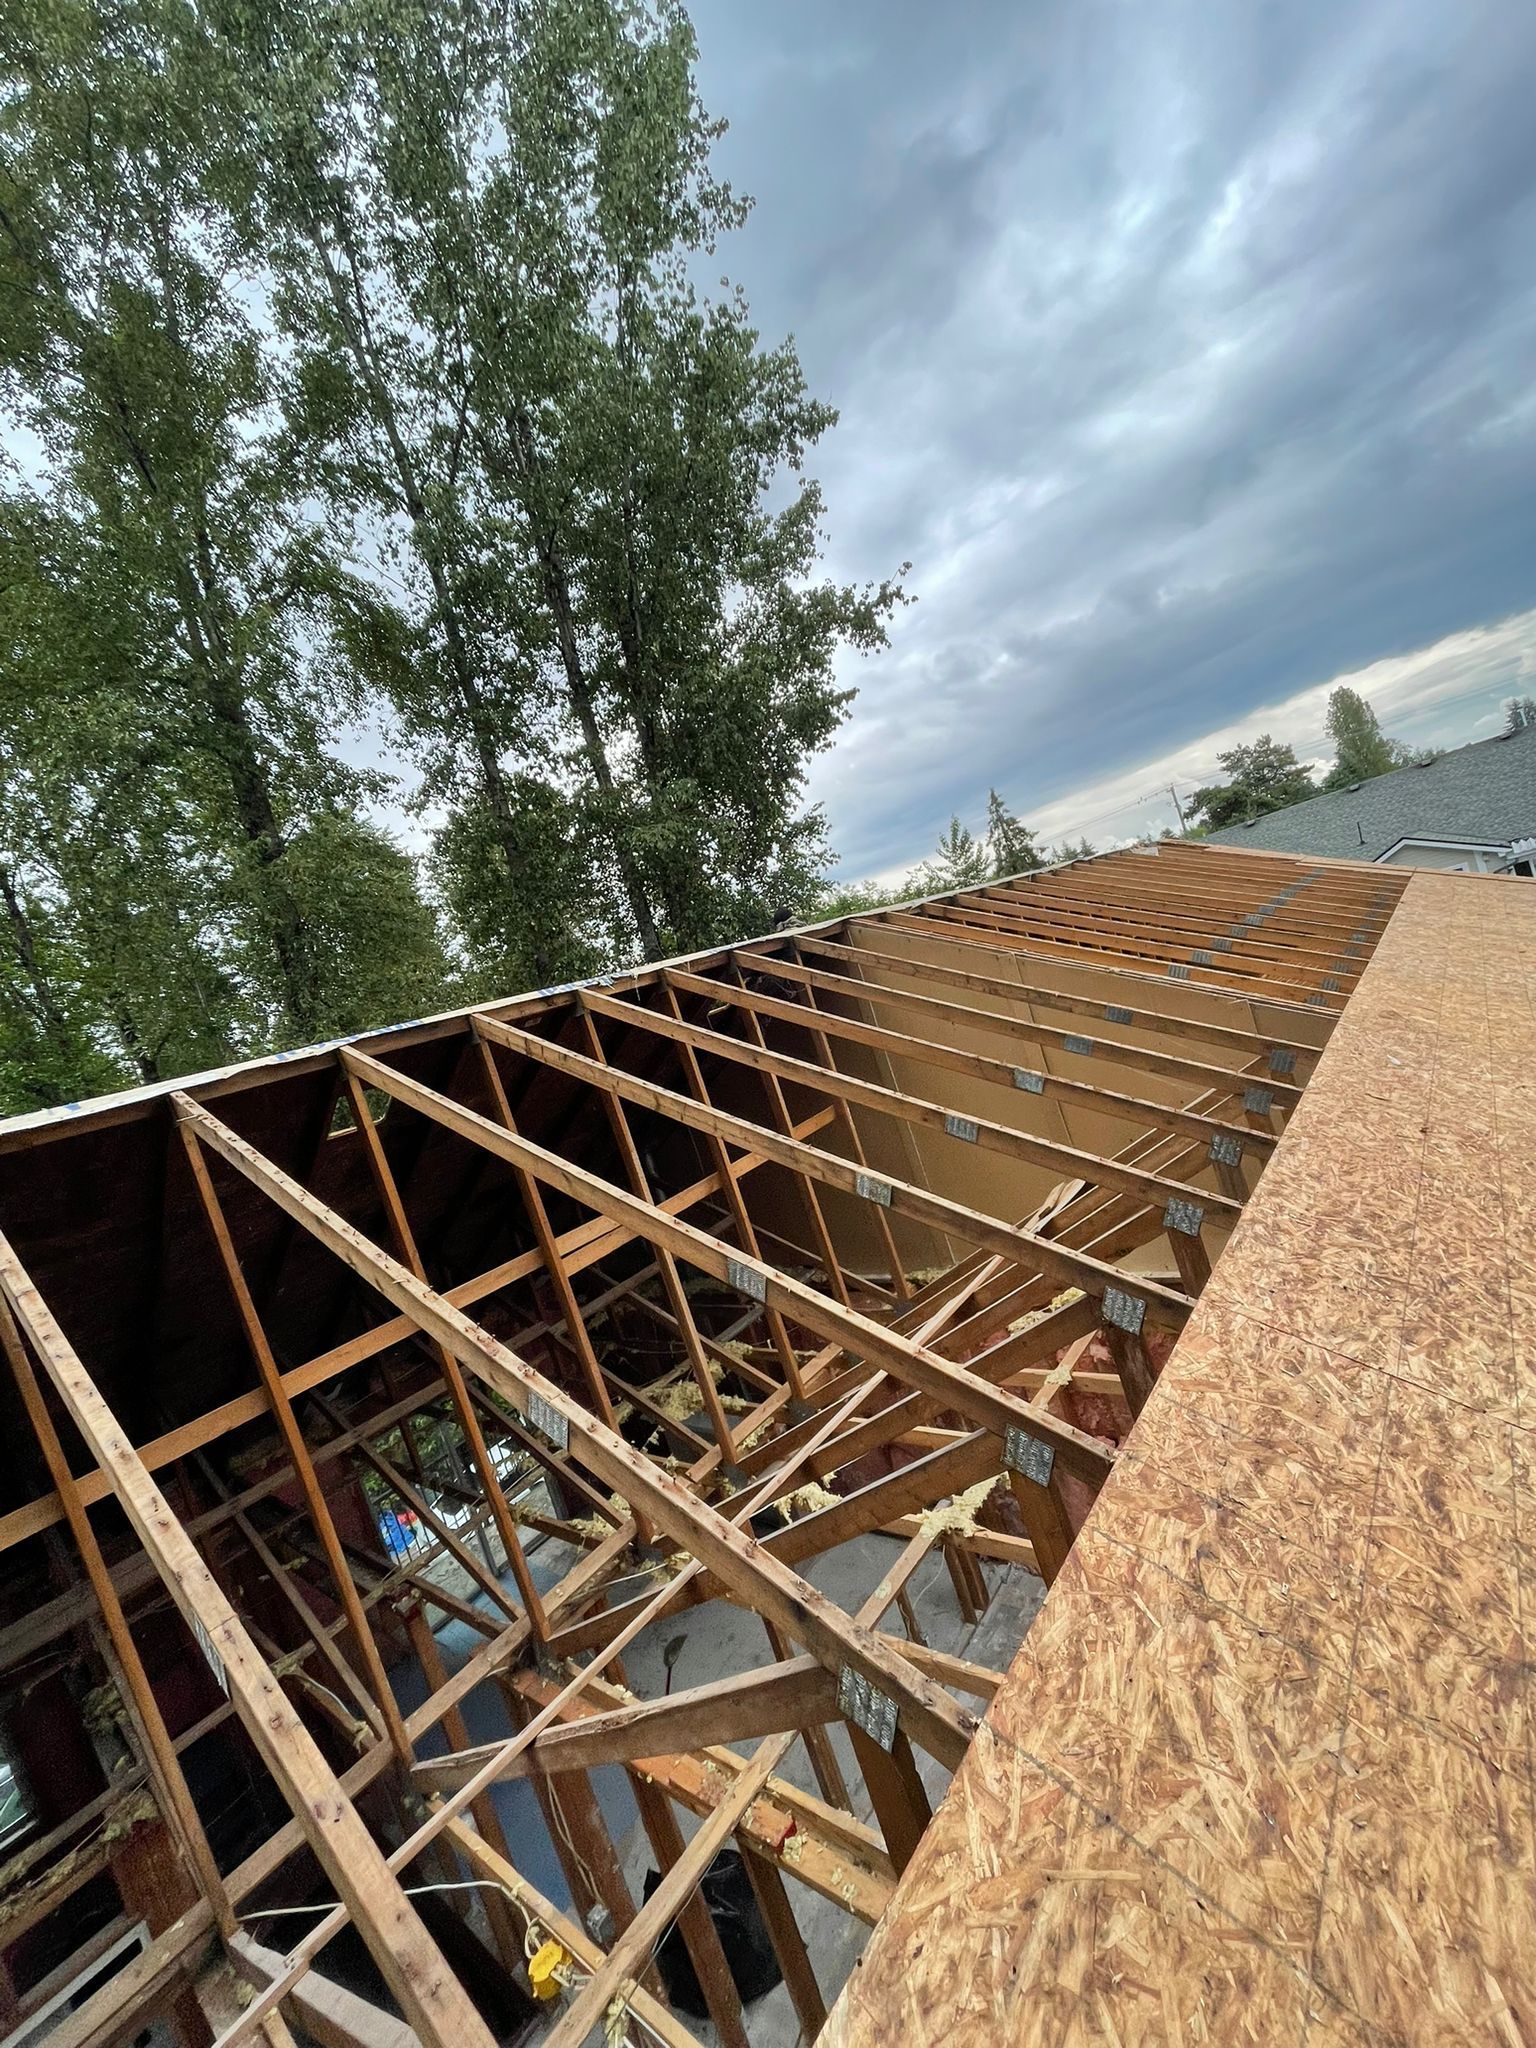
Heavy Rainfall vs. Snow Loads
Unlike parts of Canada that face months of deep freeze, Vancouver gets a combination of moderate temperatures and heavy precipitation. However, we do occasionally see a snowfall event that dumps several inches—or more—of that wet, slushy snow. That snow is heavy. It can add significant loads to your roof if it accumulates quickly.
- Snow Load Notes: The BC Building Code specifies minimum roof snow loads (measured in kilopascals, or kPa), but this varies depending on your exact region and elevation. The local municipal guidelines may require higher load capacity in areas like North Vancouver or West Vancouver due to their proximity to the mountains.
- Inspection Tip: If you live near or at higher elevations (like in parts of Coquitlam or West Van), double-check your roof design can handle heavier snow loads. Some older homes weren’t built with the same load standards as modern builds.
Ongoing Maintenance Tips
There’s no magic wand to guarantee a leak-free roof forever, but there are regular maintenance habits you can form to keep things in great shape year-round. Think of your roof as an extension of your home’s health—it’ll last longer if you give it a bit of TLC periodically rather than ignoring it until there’s an emergency.
Regular Roof Inspections
A quick peek at your roof a couple of times per year can save you a world of trouble. If you’re comfortable climbing a ladder, you can do a visual check. Otherwise, a pair of binoculars from the ground can help spot missing shingles or other obvious signs of damage.
- What to Look For: Curling or buckling shingles, missing granules, exposed nail heads, or sagging gutters.
- When to Schedule: Early autumn and late spring are my favorite times. That way, you’re catching issues before the rainy season hits and after the winter has passed.
Seasonal Storm Preparedness
We’ve all experienced those sudden windstorms that knock out power across entire neighborhoods. High winds can loosen shingles or blow off chimney caps. If you hear a big thud on your roof during a storm, it’s possibly a tree branch. Don’t shrug it off—inspect as soon as it’s safe.
- Tip: Keep trees trimmed away from the roof. Branches rubbing against shingles can wear them down. Falling branches can puncture the roof membrane.
Year-Round Gutter Care
Believe it or not, gutter clogs are a leading cause of leaks, mold growth, and even foundation damage. Yes, it’s that serious. Because we get so much precipitation in Vancouver, water that doesn’t drain properly will find somewhere else to go—even if that means seeping under your shingles or siding.
- Leaf Screens or Guards: Some folks install leaf guards to minimize the debris in their gutters. They can help, but they’re not a “set it and forget it” solution. You still need periodic checks to ensure nothing is sneaking in.
- Downspout Extensions: If your downspouts deposit water too close to the foundation, extend them a few feet away from the house to protect the basement or crawl space.
Real Experiences: Winter Disasters Resolved
Let me share a few experiences that stick out in my mind. I’m not talking about these to brag, but just so you know these scenarios really do happen around here:
- Waterfall in the Living Room (East Vancouver): A family called me up during a massive rainfall. Their roof had a previously unnoticed flashing crack around the chimney. It didn’t matter much in light drizzle. But when we got hammered with a full day of pounding rain, water poured in. There was literally a mini-waterfall in their living room. Fortunately, we got there, set up tarps to stop the onslaught, and then replaced the damaged flashings the next day.
- Moss Attack (North Delta): A homeowner realized they had an entire ecosystem thriving on their north-facing roof. Moss, algae, you name it. Wet conditions and shade from tall evergreens fed that mess. It trapped moisture so effectively that the plywood sheathing began to rot. We had to remove several layers of roofing material in the affected area, replace rotted sheathing, and treat the rest of the roof for moss.
- Snow Load Surprise (Coquitlam): It doesn’t happen often, but one December a freak snowstorm dumped about 30 cm (just under a foot) of heavy, wet snow overnight. An older home’s roof near the Coquitlam Crunch hiking trail was just not designed for that weight. Some structural elements started to bow. We did emergency shoring up in the attic and removed the snow load. Then we reinforced certain rafters according to local code requirements.
In all these stories, a little preventative maintenance—like clearing the roof of debris, checking flashings regularly, or reinforcing older roof structures—could have mitigated the damage before it got out of hand.
The Facts and Figures: Local Meteorological Data
I’m no meteorologist, but I pay attention to what they say. Statistics from Environment Canada show that Vancouver typically sees around 1,200 mm (about 47 inches) of precipitation a year, spread across roughly 154 rainy days. On top of that, we might see a handful of days with snowfall, which can fluctuate wildly. Some winters pass by with barely a dusting; other years, we’ll get a few storms that bury the streets.
- Rain Intensity: The Lower Mainland can experience “Pineapple Express” atmospheric rivers—warm, moisture-laden systems that can dump a large volume of rain in a short period.
- Windstorms: Gusts can reach 70 km/h or more during strong Pacific storms, sometimes toppling trees or causing power outages. If your roof’s shingles are old or not fastened properly, strong winds can dislodge them.
All these factors mean that a roof in Vancouver, Surrey, Langley, or any surrounding city endures a lot of wear and tear from rain, wind, and occasional snow. Over time, that’s a recipe for leaks if your roofing system isn’t well-maintained.
Local Building Code Notes for Snow Loads and Rainfall
If you’ve ever gone through a renovation or new construction, you know building codes can feel like a labyrinth. But they exist to keep our homes safe. The BC Building Code addresses roof loads, minimum roof slope requirements, and drainage standards to ensure your home can handle typical (and sometimes not-so-typical) Vancouver weather.
- Snow Load Requirements:
- These vary by region and altitude. The code references ground snow loads, which might range from about 1.5 kPa in some coastal areas to higher values in mountainous regions. Certain parts of Metro Vancouver will have lower minimums than, say, Chilliwack or Squamish because those inland or higher-elevation areas can get more snowfall.
- If you’re renovating an older home built decades ago, it might not meet current standards. It doesn’t necessarily mean your roof is unsafe, but if you suspect structural issues, it’s wise to consult an engineer or a qualified roofer.
- Rainfall Considerations:
- The code requires roofs to have adequate drainage. This means proper slope, gutter sizing, and downspouts that direct water away from the foundation.
- If you’ve got a flat or low-slope roof—which is fairly common on certain modern or mid-century designs—there are additional requirements like scuppers or internal drains to prevent ponding water.
- Ventilation and Insulation Guidelines:
- The code also specifies minimum ventilation requirements for attics, eaves, and roof cavities.
- Insulation requirements keep rising over the years as energy efficiency standards improve. For our mild coastal climate, you might see R-40 or higher recommended in the attic. Always verify with the most recent code cycle or local bylaws.
I like to stay updated on code changes, not just because it’s part of being a professional roofer, but because it helps me give solid advice. If your roof was built to older standards, I’d suggest you keep an eye on it, especially when we have those uncharacteristically heavy snowfalls. The last thing you want is a crack forming under the weight of wet snow.
DIY Solutions vs. Professional Help
I get it: Some of us like rolling up our sleeves and tackling repairs ourselves. There’s a certain satisfaction in knowing you fixed something on your own. But with roofs, safety is paramount, and some tasks can be riskier or more complex than they appear. Here’s a quick breakdown:
Simple DIY Tasks
- Gutter Cleaning: If you’re stable on a ladder and cautious, cleaning gutters is something many homeowners do themselves. Make sure you have a reliable spotter or at least tell someone you’re going up there. Slippery conditions are no joke.
- Basic Debris Removal: Sweeping off leaves or branches with a soft broom is usually fine if you can do so safely without stepping onto fragile or steep roof sections.
- Visual Inspections: A pair of binoculars is your friend. Spotting missing shingles or cracked flashings can be done from ground level in many cases.
When to Call in a Professional
- Major Leaks or Structural Damage: If water is already infiltrating the interior, you might have rot or compromised decking that requires more invasive repair.
- Roofing Material Replacement: Shingle or membrane replacement might seem straightforward, but if it’s not done correctly, you can create new points of failure.
- Steep Pitches or Multi-Story Homes: If your roof’s pitch is steep or it’s a tall building, it can be dangerous to climb around. Fall protection and expertise matter a lot here.
I’ve met folks who started a DIY job, then realized mid-way they were in over their heads. No shame in that. Better to be safe and ensure the job’s done right—especially in a climate where we rely on our roofs to hold up against incessant rain and the occasional storm.
A Quick Word on Trust and Transparency
Roofing is an essential part of your home’s defense system, and it’s easy to feel overwhelmed by the amount of care it might need. I’ve been on both sides of the conversation: as a homeowner who wants reassurance and as a roofer who’s seen all manner of issues. The key is transparency.
- Honest Assessment: If a roofer ever suggests a massive overhaul without thoroughly checking the roof’s condition, be cautious. Sometimes minor repairs are enough to extend the life of your roof by years.
- Material Choices: If you’re told to replace shingles or your entire roof, ask what materials are being recommended. In the rainy Lower Mainland, you’ll want something that holds up well to moisture—like asphalt shingles rated for high wind and heavy rain, or even metal roofing for extended durability.
- Ask Questions: Don’t hesitate to ask how or why a particular procedure is needed. A good roofing pro won’t mind explaining the reasoning.
In my experience, the more open conversations we have with homeowners, the better the outcome. People appreciate knowing the full story, and we can work together to protect homes in the region from the harsh realities of Vancouver’s winter and rainy season.
Seasonal Maintenance Checklist (Detailed Version)
To wrap up the essential points—without calling it a conclusion—let me restate a more detailed version of that seasonal maintenance checklist. This is the one I keep pinned in my truck so I can rattle it off whenever a friend or neighbor asks, “Hey Harman, what should I be doing for my roof this time of year?” Yes, it’s a bit thorough, but trust me, thorough saves time and money in the long run.
- Clean and Inspect Gutters
- Remove leaves, dirt, and miscellaneous objects.
- Flush with water to ensure free flow.
- Check gutter seams and downspout connections for leaks.
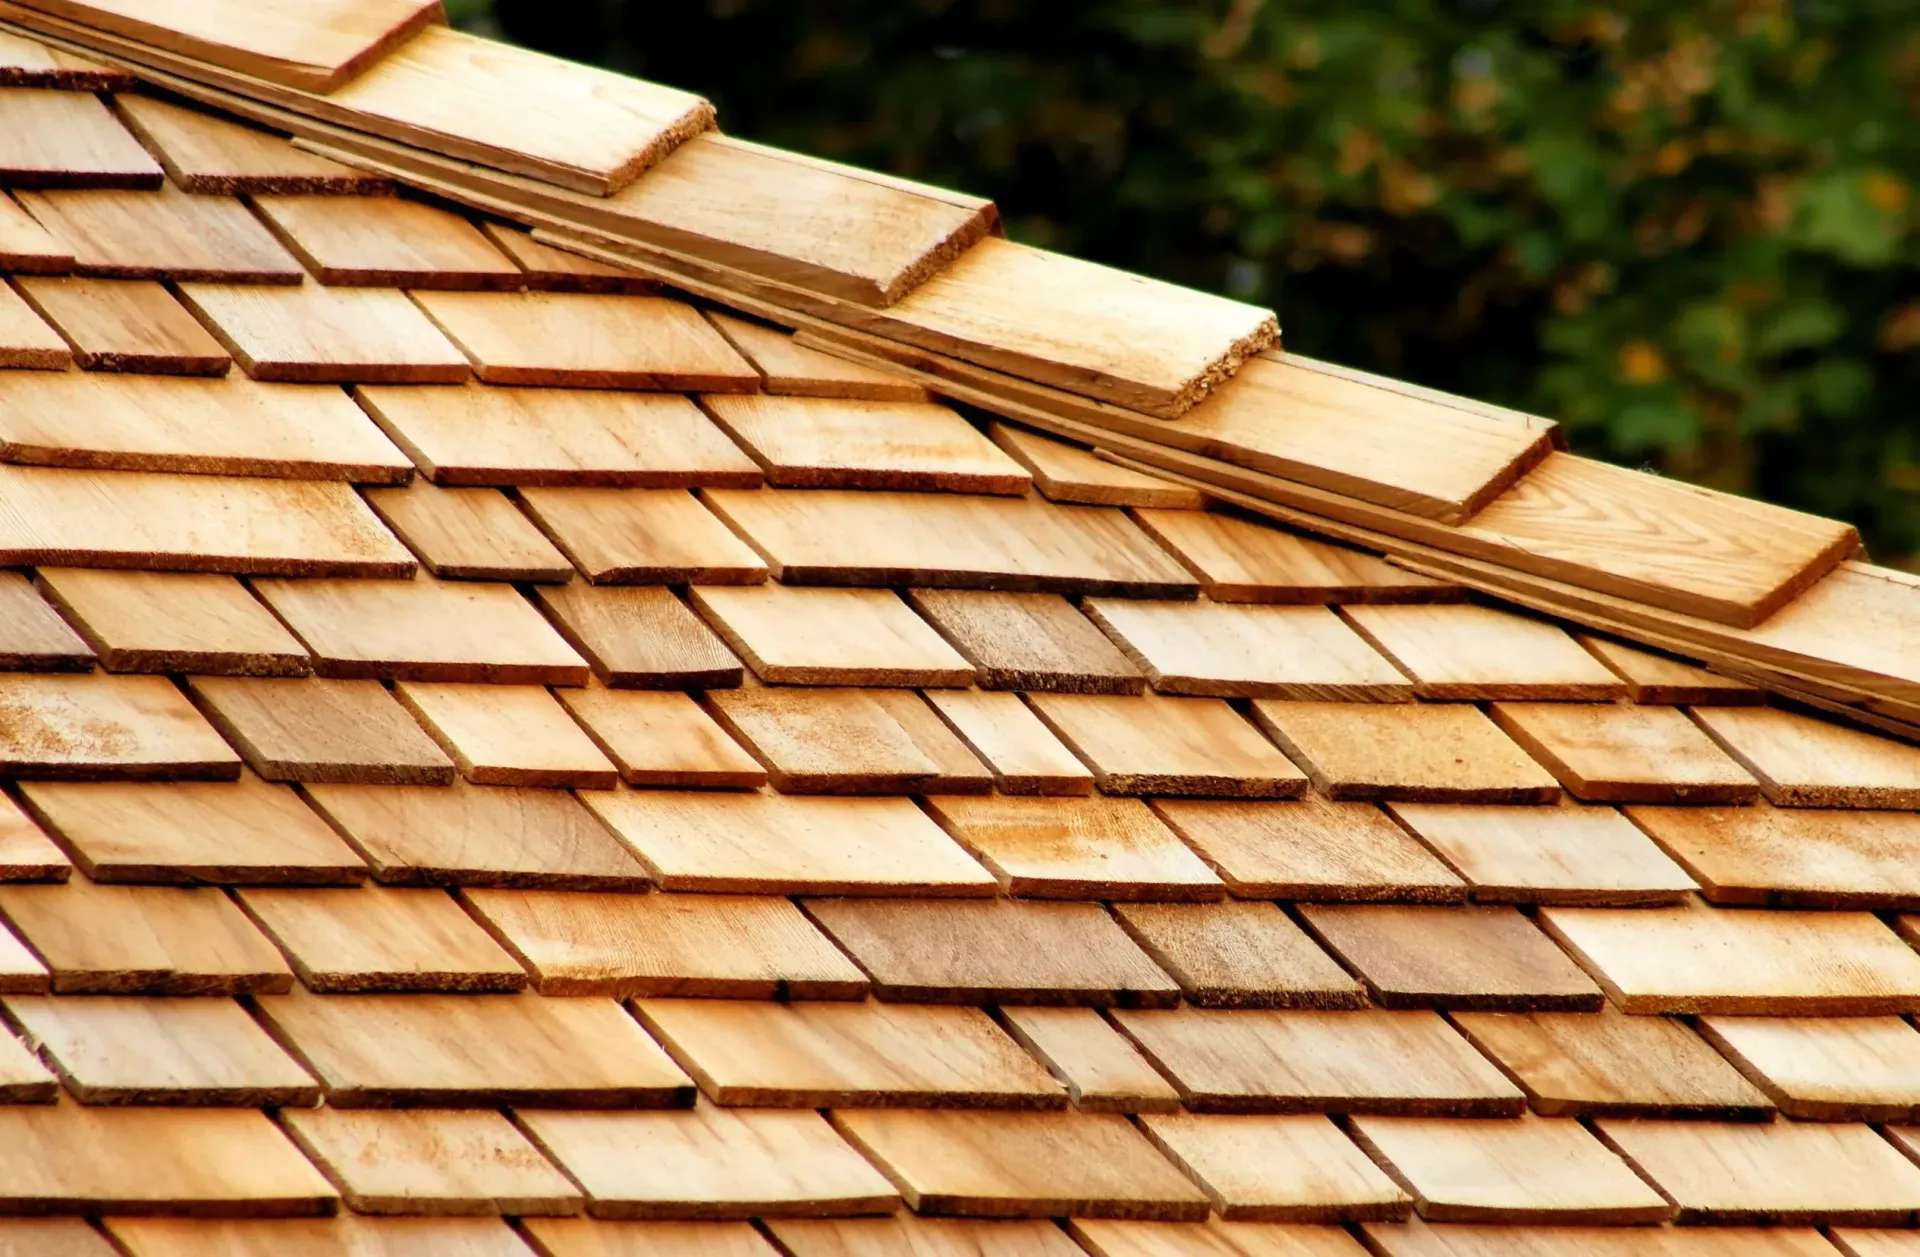
- Check Roof Surface for Damage
- Visually inspect or use a ladder on a safe day (dry conditions, calm weather).
- Look for cracked or missing shingles, loose nails, or any sign of warping.
- If you have a metal roof, check for corrosion or loose screws.
- Look for Moss, Algae, or Debris Build-Up
- Gently remove any accumulations.
- Consider a roof-safe cleaning solution if moss is persistent.
- Schedule a follow-up check if moss is a recurring issue (especially on shaded or north-facing slopes).
- Assess Flashings and Seals
- Examine around chimneys, vents, skylights, and dormers.
- Reseal with roofing cement if you see gaps or cracks.
- Replace severely corroded flashings.
- Ventilation and Insulation Check
- Peek inside the attic to ensure vents aren’t blocked.
- Look for signs of condensation—if the attic feels excessively humid, that’s a clue.
- Confirm insulation is at recommended levels and properly installed (no big gaps).
- Monitor for Leak Traces
- Inspect attic corners for dark spots, damp insulation, or musty smells.
- Examine interior ceilings, especially around fixtures and exterior walls.
- Use a moisture meter if you suspect hidden dampness.
- Trim Overhanging Branches
- Keep trees at least a few feet away.
- This reduces leaf buildup, prevents branch damage, and helps with roof longevity.
- Stay Weather-Aware
- If a heavy rainfall warning or windstorm is forecast, double-check your gutters and secure any loose items around the yard.
- After any major storm, do a quick inspection for damage.
- Plan for Snow Loads (If a Storm Arrives)
- Keep a roof rake handy if your roof is accessible and you can remove heavy snow safely.
- Watch for signs of stress if snow accumulates quickly, such as creaks in the attic.
- If in doubt, call a professional to safely remove snow.
- Document Changes
- Keep a small log or take photos of your roof each season. Over time, you’ll be able to spot changes or deterioration patterns.
- This documentation can be invaluable for insurance or warranty claims.
Balancing Perplexity & Burstiness in Roof Care
I know this might sound like a lot. You’re thinking, “Harman, I just wanted a simple pointer or two, and now I’ve got the Encyclopedia of Roof Maintenance.” But let’s face it, Vancouver winters can be unpredictable, and a little knowledge goes a long way. People sometimes ask, “Isn’t it enough just to have a roof over my head?” Sure, it works—until the day that roof starts leaking at 3 a.m., and you’re scrambling to find a bucket while your cat meows in disapproval.
The more you can do to prevent that scenario, the better off you’ll be. A roof is like the unsung hero that quietly endures the elements day after day. Every time the North Shore mountains catch a new batch of clouds and send them your way, your roof stands guard. Why not give it a bit of love back?
Final Thoughts on Winter Roof Preparation
While we don’t call this a conclusion, I do want to highlight that winter roof preparation in Vancouver—or any city in the Lower Mainland—comes down to consistent care. You’ve got heavy rains, possible windstorms, potential snow loads (though fewer than some other parts of Canada), and a climate that fosters mold and algae. Staying ahead of those threats is simpler than dealing with a full-blown emergency.
- Don’t Put It Off: A small leak won’t stay small forever.
- Use the Right Tools: Get non-corrosive roof rakes, safe cleaning solutions, and proper equipment if you DIY.
- Ask for Professional Guidance When Needed: Sometimes a quick expert assessment can spare you days of headache and potential structural damage.
I’m all for saving a buck where it makes sense, and I fully support a bit of DIY spirit—provided safety is in place. But when you’re dealing with complicated repairs or uncertain structural issues, it’s wise to bring in a professional. Over the years, I’ve climbed too many slippery rooftops to count, and each time I’m reminded: we’re perched above everything that matters—our families, our pets, our prized possessions. We want that shelter to be reliable.
At the end of the day, Vancouver’s winter (or rainy season, if you prefer to call it that) doesn’t have to be a nightmare for your roof. With a little preparation, some common-sense maintenance, attention to insulation and ventilation, and a watchful eye for leaks or mold, you can keep your home cozy and dry while the rain does its West Coast thing. And if you ever find yourself in a pinch, just know that these roofs we build and maintain are built to handle a good Vancouver soaking—so long as we do our part.
Stay dry out there Vancouver,
Harman
FAQ #1: Why is winter roof preparation Vancouver so important?
Because our beloved Lower Mainland weather isn’t shy about handing out massive amounts of rain (and occasional wet snow), your roof needs to be ready for anything. I’m Harman, the owner of a local roofing company in Vancouver, and I’ve seen how fast problems can escalate when this region’s winter storms roll through. One day it’s mild with a light drizzle, and the next, we’re contending with an atmospheric river. By prepping your roof before the season hits, you reduce the risk of leaks, mold, or even structural damage.
Here’s what typically happens around here: The moment leaves start piling up in gutters and moss settles in shady roof corners, water has a harder time draining. That trapped moisture can seep into your attic or walls. If you sort out those little trouble spots now, you’ll avoid discovering them later via a dripping ceiling at 2 a.m. during a torrential downpour. Think of winter roof preparation as your roof’s version of a flu shot—preventative care that keeps the bigger issues away.
FAQ #2: When should I schedule a roof inspection winter Vancouver service?
The sweet spot for a winter roof inspection in Vancouver is typically late fall, right before the heavy rains set in. If you miss that window (maybe life got busy or you forgot—and trust me, it happens), you can still have an inspection done during winter. You just want to pick a day where the weather is dry enough for someone to safely climb and check things out.
The best reason for a winter-focused inspection is that the rain itself often reveals hidden vulnerabilities. A roofer might spot freshly wet areas in the attic or discover compromised shingles that hold moisture. In my experience, inspections during or right after rainfall sometimes reveal tiny leaks you can’t see at other times of the year. And let’s face it, in Vancouver, you don’t always have to wait too long for rain to arrive!
FAQ #3: How can roof leak prevention Vancouver help me save money?
Leaks might start small—maybe you see a faint brown spot on the ceiling or catch a subtle musty odor in the attic. But small leaks become big ones faster than you can say “umbrella.” When water seeps through your shingles or around flashings, it can soak insulation, rot wooden supports, and even affect your electrical systems if it migrates far enough.
Preventing these leaks in the first place is usually as simple as keeping your gutters clear, ensuring flashing is sealed, and replacing worn shingles. Each of these tasks is cheaper than dealing with extensive water damage or mold removal. One of the biggest hidden costs homeowners face in Vancouver is mold remediation—something that can skyrocket if moisture goes undetected for months. By focusing on leak prevention, you’ll save the headache and cost of major repairs down the road.
FAQ #4: What are the top signs I need a winter roof inspection in Vancouver?
Stains on Ceilings or Walls: Even the slightest brownish ring on your ceiling is a red flag.
Musty Smells: If you open your attic hatch and are greeted with a funky odor, you might have trapped moisture up there.
Shingle Damage: Curling, buckling, or missing shingles are easy to spot from the ground with a decent pair of binoculars.
Overflowing Gutters: If water cascades over your gutters during rain, you’ve probably got a blockage—or your gutters just can’t keep up.
Damp Attic Insulation: Sometimes, a quick feel of the insulation reveals it’s damp or clumpy.
The moment you notice any of these, it’s usually best to get a professional (or if you’re a seasoned DIYer, do a careful inspection yourself) to check for hidden water pathways. I’ve found serious leaks stemming from the tiniest flashings that had loosened over time—especially around skylights or chimneys.
FAQ #5: Do we really get enough snow in Metro Vancouver to worry about ice dams?
You’d be surprised. While Vancouver is hardly Whistler in terms of snowfall, we do see wet snow from time to time. And wet snow, when combined with mild daytime highs and cooler nights, can create those pesky freeze-thaw cycles. An ice dam occurs when a warmer part of your roof melts the snow, and that melted water refreezes at a colder edge—often the eaves—forming a barrier.
Even a thin layer of ice can cause water to back up under shingles. If your attic is too warm—maybe you don’t have enough insulation or proper ventilation—that accelerates the partial melt and leads to ice dams. So yes, even though we don’t typically have months of snow, the conditions we do experience are enough to make ice dams a real possibility every few years. Prevention usually starts with ensuring your attic is well-insulated and adequately ventilated.
FAQ #6: How does proper ventilation help with winter roof preparation Vancouver?
Ventilation might sound kind of boring or technical, but in roofing terms, it’s a game-changer. Especially in our moist climate, you want a steady flow of air through your attic. This airflow keeps the underside of your roof deck at a consistent temperature, which helps minimize the risk of condensation or uneven snow melt that leads to ice dams.
In Vancouver’s damp weather, good ventilation also wards off mold growth. The last thing you need is stale, humid air trapped up there, turning your attic into a mold breeding ground. Properly placed soffit vents draw cool, fresh air in, while ridge vents (or other exhaust vents) let warm, moist air escape. It’s an efficient cycle that extends your roof’s lifespan and helps you avoid wintertime roofing nightmares—like those sneaky leaks that only show up after a few days of non-stop rain.
FAQ #7: Are there any local building code requirements for winter roof preparation or snow loads?
Yes. The BC Building Code outlines minimum roof snow load requirements, which vary by region and elevation. If you’re in the city of Vancouver proper, the mandated snow load might be lower compared to higher-elevation areas like parts of Coquitlam or North Vancouver. Even so, you should confirm that your roof meets the local design parameters if you suspect the structure is older or not up to code.
Beyond snow loads, the code also touches on ventilation and insulation guidelines. Vancouver’s mild, wet climate means we focus more on moisture control and less on extreme cold, but you still need to meet the minimum R-value for insulation (often R-40 to R-50 in attics). If you’re unsure, a quick check with the city or a knowledgeable roofer can tell you whether your home is up to current standards. It’s always better to be safe than sorry—especially if we get an unexpected snowy spell.
FAQ #8: Can I handle roof inspection winter Vancouver tasks myself, or do I need a professional?
It depends on your comfort level, your roof’s pitch, and the type of work needed. If we’re talking about routine checks—like peering into your attic for leaks, looking for missing shingles from the ground, or clearing your gutters—you can often do these safely yourself. Make sure you’ve got a sturdy ladder, non-slip shoes, and ideally a helper to spot you.
But if you’re noticing more advanced issues, like widespread shingle damage, structural sagging, or large, persistent leaks, professional help is safer and more thorough. Also, if your roof is particularly steep or high, the risk of a slip is real—Vancouver’s wet conditions can make roofs extremely slippery. A pro not only has the right tools and safety gear but also the experience to spot subtle problems that might not be obvious to the untrained eye.
FAQ #9: How often should I clean my gutters to ensure roof leak prevention Vancouver?
Given how many trees and leaves we have around the Lower Mainland, I recommend cleaning gutters at least twice a year—once in late fall, after the leaves have mostly dropped, and again in spring. However, if you have lots of overhanging branches or you notice gutters overflowing during heavy rain, you might need to do it more frequently.
Leaves, moss, and debris block water flow, causing spillovers that can damage your fascia boards or even seep into your roof’s edges. One of the worst winter leaks I’ve seen started simply because the homeowner had neglected to clean the gutters for a couple of seasons, and everything got backed up. A little elbow grease every now and then goes a long way to prevent thousands of dollars in potential damages.
FAQ #10: Why does mold and mildew seem more common on roofs around Vancouver?
Short answer: It’s wet here. Longer answer: Vancouver’s coastal climate is perfect for mold and mildew growth—mild temperatures combined with frequent rain and high humidity levels. When water sits on your roof for days, especially if it’s shaded by trees or not getting direct sunlight, it creates a cozy environment for mold and algae.
Moss is another big culprit. It clings to shingles, trapping even more moisture. Over time, that constant dampness can degrade shingle materials, cause rot in the underlying decking, and even lead to health issues if spores infiltrate your home’s ventilation. Regularly inspecting and gently removing moss or mildew buildup makes a big difference in extending the life of your roof.
Our Roofing Blog

Have more questions about roofing?
Check out our FAQs or give us a call today to speak to an expert roofer in Vancouver Lower Mainland, BC. We're here to help our neighbours make educated decisions about their roof. For our team, we value helping clients save money while making their roofs last.
