Comparing Torch-On Membranes vs. TPO vs. EPDM for Low-Slope Roofs in Vancouver
The Ultimate Guide on Torch on, TPO and EPDM for Vancouver Roofs!
Winter Disasters: Stories from the Field
I’ll never forget a particular winter night a few years back. It was one of those relentless Metro Vancouver storms—rain pounding down in sheets, wind howling like it had a personal grudge against every roof in the neighborhood, and temperatures flirting with the freezing mark. People in Vancouver, Surrey, and Delta huddled inside their homes, wondering if their roofs would hold up against the onslaught.
Around midnight, I received a frantic call from a homeowner. Water was gushing from the living-room ceiling, right through the recessed lighting. Picture an indoor waterfall, complete with panicked family members running around, trying to save electronics, furniture, and sanity all at once. I raced over, flashlight in hand, to find that their low-slope addition had a compromised seam in its membrane. The combination of wind-driven rain and slight ponding on the roof had found just enough of an opening to pour straight into the house.
We managed a temporary patch—some quick-sealing compound and a heavy-duty tarp—just to get them through the night. By noon the next day, we had a more robust repair in place. But that wasn’t the last time I’d witness a winter roofing crisis.
A different scenario came up in Surrey, where a property owner had a new TPO roof that looked immaculate—clean, white, and apparently top-of-the-line. Except the drains were clogged by leaves. Temperatures dipped below freezing, turning the pooled water into ice and creating pressure that stressed the TPO seams. That mini skating rink on top eventually cracked, allowing water in. We cleared the debris, defrosted the drains, then sealed the membrane sections properly. Their hardwood floors were spared major destruction, but the near miss was a wake-up call.
Then there was an older torch-on roof in Delta, right near the Fraser River, where wind and humidity make an especially potent combination. The homeowner had noticed a few small blisters on the membrane but hadn’t paid them much mind. After all, they weren’t leaking—yet. But with the next cold snap, the moisture inside one blister froze, expanded, and tore the membrane open. Water started seeping in through the attic and into a bedroom. By the time we got there, the drywall had already begun to collapse. We ended up replacing much of that section of membrane and ensuring fresh flashing and vents were tightly sealed.
I could go on and on: the 2 AM calls, the frantic homeowners, the improvised tarp setups on slushy, slippery roofs. After seeing all these crises, I can’t stress enough how much of a difference a properly installed and well-maintained low-slope roofing system can make. It’s not just about choosing the right product—though that’s crucial—but also about staying on top of maintenance and being aware of potential failure points, especially during our erratic West Coast winters.
Understanding the Vancouver Climate and Its Impact on Low-Slope Roofs
Rainfall and Humidity: The Power Duo
In the Lower Mainland, rain is practically our middle name. With annual averages that can exceed 1,200 millimeters, we’re living in a temperate rainforest environment—complete with moss, mold, and enough puddles to keep your rain boots in constant use. All that moisture is tough on roofs, especially low-slope systems.
Steep-pitched roofs have gravity on their side—water simply runs off quickly. But low-slope roofs rely on good design, well-placed drains, and routine clearing of debris. If drains or scuppers get clogged with leaves, branches, or the odd plastic grocery bag the wind blows in, water will linger. Ponding water increases the chance of seepage, and once any seam or flashing is compromised, that water finds a quick path inside.
It’s not uncommon in Vancouver to get several continuous days of heavy rain. A neglected low-slope roof can see significant water collection during these periods. The weight alone can stress the structure if it’s not built to handle extra loads. Worse, constant dampness can degrade adhesives and underlying decking.
Snow Loads and Freeze-Thaw Cycles
Although Vancouver’s winters aren’t as brutal as in some other parts of Canada, we do get snow—often wet, heavy dumps that come in a brief flurry and then melt within days. On occasion, though, that snow can stick around, and this is where the trouble starts.
Wet snow is heavier than the dry, powdery stuff. When a big snowfall drops a few centimeters (or more) of heavy, slushy snow onto a low-slope roof, the load can be substantial. The BC Building Code includes guidelines for snow loads, but many older homes or small additions might not have been designed with unusually heavy snow in mind.
Then there’s the freeze-thaw cycle. Snow melts during the day, refreezes overnight, creating ice that can push into flashing or under membrane seams. Over time, that can cause splits, cracks, and blisters to develop or worsen. Once the membrane is compromised, any subsequent rainfall can quickly infiltrate the roof system.
Wind-Driven Rain and Storm Gusts
The Pacific storms that roll into Vancouver can bring strong winds. A big system can see gusts exceeding 60 or 70 km/h—and sometimes, even more intense bursts. For a low-slope roof, the real risk is wind-driven rain that can find its way under loosely secured flashing or at perimeter edges. If the membrane isn’t properly attached around the edges, strong winds can also cause a partial uplift, resulting in tears or seam failure.
Any roofing system—torch-on, TPO, or EPDM—must be well-secured around all edges to stand a chance against these storms. A tiny gap at the corner can act like a funnel, letting water travel inwards. Once water penetrates a roof system under pressure, it can spread fast, showing up in places far from the original entry point.
Statistics on Winter Roof Failures in the Region
Even though Vancouver’s climate is milder than, say, the Prairies or the Interior, winter still causes a surprising number of roof issues. Local contractors often report a spike in emergency repair calls during late November to mid-January—the prime storm window. From anecdotal evidence, about 15-20% of all annual emergency roof calls happen in those peak weeks.
Insurance adjusters have also noted that certain major storm events led to hundreds (and in some cases, over a thousand) roof-related claims in a single winter season. Common reasons? Failed membranes, neglected maintenance, clogged drains, and, of course, age-related degradation.
In many instances, older torch-on roofs or incorrectly installed single-ply membranes are at the heart of these failures. But even high-quality TPO and EPDM systems can fail if the flashing and drainage aren’t up to snuff, or if they’ve been punctured by flying debris. The lesson: a well-chosen membrane is vital, but so is proper installation and ongoing care.
BC Building Code Notes on Snow Loads and Rainfall
The BC Building Code provides a framework for roof design, especially regarding structural loads and waterproofing. While it’s not the most riveting subject, it’s crucial if you want a roof that can stand up to the region’s quirks—like sideways rain, wet snow, and occasional windstorms.
Structural Requirements
- The BC Building Code mandates that all roofs meet certain minimum standards for snow and wind loads. Even in Vancouver, where snow accumulation isn’t constant, roofs must be built to handle a potential heavy dump of wet snow.
- Load calculations take into account factors like roof slope, exposure to wind, and building geometry. A slightly higher slope can improve drainage, though for many low-slope roofs, the standard minimum is often around 2% (1/4 inch per foot).
Membrane and Flashing Standards
- Section 9.26 of the code deals with roofing in residential settings, specifying that materials must conform to CSA standards and be installed following manufacturer guidelines. Torch-on, TPO, and EPDM all have variants that meet these criteria, but correct installation is key.
- Flashing around edges, parapets, and penetrations must be watertight and durable. The code won’t dictate exact brands, but it does require performance that stands up to heavy rainfall and potential freeze-thaw scenarios.
Drainage Requirements
- Adequate drains, scuppers, or gutters are a must, with the size and placement designed to handle local rainfall intensity. In areas prone to heavy leaf fall—like many Metro Vancouver neighborhoods—regular cleaning is vital, or your roof can quickly turn into a shallow pond.
If you’re retrofitting an older building or constructing an addition, it’s worth checking with local authorities in Vancouver, Burnaby, Surrey, or wherever you reside. Requirements can vary slightly, and some municipalities have stricter guidelines based on local experiences with storms.
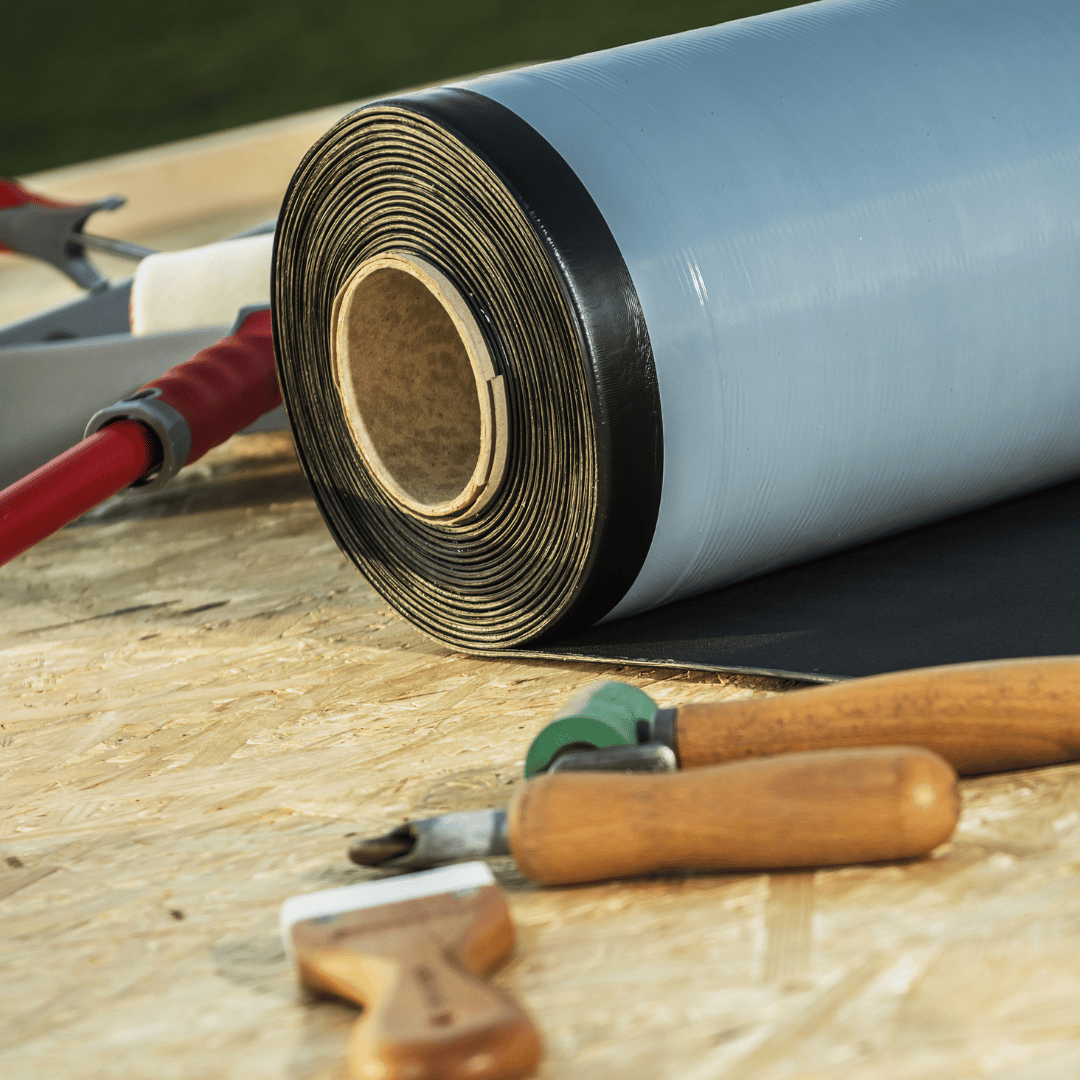
The Torch-On Membrane Option
Torch-on (or torch-down) roofing, often referred to in technical circles as Modified Bitumen Membrane (MBM), is a go-to for many low-slope roofs in BC. It’s typically made from asphalt modified with polymers like APP (Atactic Polypropylene) or SBS (Styrene-Butadiene-Styrene), giving it extra elasticity and weather resistance.
Why Torch-On Can Work Well Here
- Durability
Torch-on membranes are relatively thick, offering strong resistance to punctures and foot traffic. In Vancouver’s climate, where we might get sudden temperature shifts but generally avoid extreme cold, torch-on tends to hold up nicely. - Seam Strength
The seams are heat-fused with a propane torch, creating a tight bond. Done correctly, these seams can be highly resistant to wind-driven rain. - Decent Lifespan
Many torch-on systems last 15 to 20 years. In Vancouver, I’ve seen well-maintained torch-on roofs exceed 20 years without major leaks.
Leading Brands
- IKO Torchflex: IKO is known for various roofing products, including shingles and torch-on membranes. Torchflex is designed for SBS-modified bitumen systems, offering multiple layers (base sheet, cap sheet) for added protection.
- CertainTeed Flintlastic: CertainTeed is another major player. Flintlastic is their line of modified bitumen solutions, offering both SBS and APP-based options. They have various granule colors for the cap sheet, useful if you’re concerned about aesthetics.
- Mule-Hide Modified Bitumen: Mule-Hide provides both APP and SBS membranes, and they’re known for distributing roofing materials widely across North America. Their products often come with specialized installation accessories.
- Elevate (Formerly Firestone): Firestone Building Products rebranded to Elevate in recent times. They have SBS and APP membranes in their portfolio, boasting robust tensile strength and a range of thicknesses.
These are just some of the top names—there are others like Soprema or Polyglass that also make torch-on membranes. The brand itself can matter, but often it’s the installation quality that makes or breaks the system.
Challenges to Consider
- Installation Complexity
Because you’re literally using a torch, the installer’s skill is critical. Overheating can damage the membrane or underlying components, while underheating yields weak seams. - Fire Risk
You’re working with open flame near combustible materials. Municipalities may have strict rules or require special insurance/bonding for torch-on applications. - Odor and Fumes
During installation, there’s no getting around the hot-asphalt smell. It typically dissipates, but if you’re in a sensitive area or a multi-unit building, neighbors might complain temporarily.
Winter Incident Example
A property owner in Burnaby with an 18-year-old torch-on roof noticed some bubbling near a vent. During a cold snap, moisture trapped under one bubble froze and tore the membrane. Water started leaking into the kitchen below. We cut out the compromised area, replaced it with fresh membrane, and sealed around the vent with a torch-applied patch. Problem solved—until the next routine inspection, at least.
TPO Roofing: A Single-Ply Contender
Thermoplastic Polyolefin (TPO) roofing is a single-ply system recognized by its white, reflective surface. It’s especially popular in commercial settings but also finds its way onto residential flat or low-slope roofs.
Strengths of TPO
- Reflectivity and Energy Efficiency
TPO’s bright surface can reflect a good portion of solar radiation, potentially lowering air-conditioning costs in the sunnier months. While Vancouver isn’t exactly tropical, the reflective quality can still help keep interior temperatures more stable. - Heat-Welded Seams
Seams are typically joined with hot-air welding, forming a uniform fusion that can be very resistant to water infiltration, as long as the installer sets the correct temperature and speed. - Competitive Pricing
In many markets, TPO is cost-effective compared to some other single-ply membranes, making it attractive for large commercial projects. - Chemical and UV Resistance
TPO membranes generally have strong UV resistance and don’t degrade rapidly in direct sunlight. They’re also resistant to certain chemicals, mold, and algae growth—handy in our moist climate.
Leading Brands
- GAF TPO: GAF is a giant in the roofing world, known more for shingles but also producing TPO membranes. They offer multiple thicknesses and robust warranty options.
- Mule-Hide TPO: Mule-Hide’s TPO line includes reinforced membranes, adhesives, and all the necessary accessories for professional installation.
- Carlisle SynTec: Carlisle has been in the single-ply roofing game for decades. Their TPO is known for solid welding properties and good dimensional stability.
- Elevate TPO: Under the Elevate (Firestone) umbrella, these TPO membranes boast wide weld windows, making them somewhat more forgiving during installation.
Potential Downsides
- Quality Variations
TPO formulations differ by manufacturer. Early generations had issues with cracking or seam failures in certain climates. These issues have improved, but brand reputation still matters. - Installation Sensitivity
Improper hot-air welding can lead to weak seams or scorching. It’s not rocket science, but experience is crucial. - Less Forgiving with Punctures
Like most single-ply membranes, TPO can be relatively thin. Falling branches, sharp tools, or an overly enthusiastic raccoon can cause a puncture that leads to big trouble.
Real-Life Winter Fiasco
A Richmond warehouse with a TPO roof looked immaculate—until a stray branch blew onto the roof during a gusty storm. It punctured the membrane near a perimeter edge with subpar flashing. Water seeped under the membrane and dripped into the storage area below. We patched the hole, re-flashed the edge, and installed walkway pads around the perimeter to help protect against future punctures. The lesson: even a great membrane can’t handle everything if the roof environment isn’t maintained.
EPDM Roofing: The Classic Rubber Membrane
EPDM (Ethylene Propylene Diene Monomer) is basically synthetic rubber, often black but also available in white. It has a track record stretching back decades, which is why it’s commonly used in commercial installations—and more than a few residential ones as well.
EPDM Advantages
- Proven History
EPDM has been around for so long that the industry knows how it behaves over time. A well-installed EPDM roof can last 25 to 30 years. - Cold Weather Flexibility
EPDM remains flexible in cold conditions, which helps it cope with freeze-thaw cycles without splitting. - Simple Repairs
If you have a small puncture or tear, you can often patch it with an EPDM-specific kit. That’s appealing for DIY-inclined folks or property owners looking to save on minor repairs. - UV Resistance
Even black EPDM tolerates direct sunlight well, resisting deterioration for a surprisingly long time.
Leading Brands
- Carlisle EPDM: Carlisle is arguably the leader in EPDM membranes. They pioneered a lot of the technology and produce a range of thicknesses and widths.
- Elevate (Firestone) RubberGard: Under the old Firestone name, RubberGard EPDM was extremely popular. Elevate continues that tradition with robust warranties and multiple installation methods (fully adhered, ballasted, mechanically attached).
- Johns Manville EPDM: Though not as ubiquitous as Carlisle or Firestone/Elevate, Johns Manville has a solid reputation and offers extensive technical support.
EPDM Disadvantages
- Seam Adhesives
Traditional EPDM installations rely heavily on adhesives for seams. Over time, these can degrade if not maintained. Modern tape systems are better but still demand regular checks. - Puncture Risk
Like TPO, EPDM is a single-ply material. Sharp objects can cause holes that, if undetected, allow water intrusion. - Heat Buildup
Black EPDM can get quite hot in summer sunlight. In Vancouver, that might not be a huge drawback, but it’s something to keep in mind for interior comfort and energy usage.
Memorable EPDM Rescue
A rooftop garden installation in East Vancouver sat atop an EPDM membrane. Over time, water from planters seeped underneath the protective layer, causing seam failure. We removed the planters, cleaned and prepped the membrane, and applied new seam tape. We also advised the homeowner to install proper drainage trays under planters to keep water from pooling against the roof membrane.
More Winter Storm Disasters: Local Stats and Observations
We often see a surge in roof emergencies right after a major wind-rain-snow combo. Data suggests 15-20% of annual roofing emergencies hit during these storm windows. Insurance adjusters in the Lower Mainland have recorded that average repair costs can range from a few thousand dollars to well over ten grand if structural or interior finishes are damaged.
From the calls I’ve personally fielded:
- 40-50% revolve around failed seams or flashing
- 20-30% are due to clogged drains and subsequent ponding
- 10-15% involve punctures from debris
- 5-10% stem from general wear and tear due to old age
- Under 5% deal with severe structural compromise (like a partial collapse)
These aren’t official government figures, but they align with the broader experience of local roofers who exchange stories at supply yards and association meetups. Torch-on membranes near the end of their lifespan, TPO or EPDM systems with poor perimeter details, or any roof that hasn’t been maintained often end up in the crosshairs of winter storms.
DIY Tips for Winter Roof Maintenance
I’m not against homeowners doing some maintenance themselves, as long as everyone stays safe and knows their limits. Here are key tips to keep your low-slope roof in shape year-round.
1. Clear Drains and Gutters
- Schedule monthly checks in fall and early winter. Leaves, pine needles, and random debris can clog outlets and create water ponds.
- Use a stable ladder and have someone spot you if possible. Vancouver’s damp weather can make ladders slippery.
2. Inspect Membrane Seams and Flashings
- Look for lifting edges, cracks, or areas where the membrane appears warped. A small repair now is far cheaper than a full-blown leak later.
- Use a membrane-specific sealant or patch kit for minor issues.
3. Remove Debris Promptly
- Sweep off branches or accumulations gently, taking care not to poke or tear the membrane.
- Trim nearby tree branches to reduce leaf and twig buildup.
4. Monitor Blisters (Torch-On Especially)
- Small blisters might just be trapped gases, but large or growing blisters could indicate trapped moisture. If you’re uncertain, call a pro rather than cutting into it yourself.
5. Check for Condensation
- Look inside your attic or roof cavity (if accessible) to see if insulation is damp or if you notice any condensation on underside surfaces. That could hint at ventilation or minor leak problems.
6. Be Realistic About Safety
- Vancouver roofs can be slippery, especially in winter. If you feel uneasy or the pitch is tricky, it’s better to call in a professional.
When to Call a Professional Roofer
Not all issues can be tackled with a patch kit and a ladder. Here are instances where it’s best to seek professional help:
- Major seam failures or extensive membrane lifting
- Large blisters or widespread ponding that won’t drain
- Structural concerns like sagging roof decks or major cracks in interior ceilings
- Drainage overhauls requiring redesign
- Significant storm damage with multiple punctures or damaged flashing
Practical Solutions and Vancouver-Specific Insights
Any roofing material can work if installed correctly and maintained. But each membrane type has quirks that might suit one homeowner more than another.
Torch-On Considerations
- Ideal for small to medium roofs, especially if you want robust waterproofing and can find an experienced torch applicator.
- IKO, CertainTeed, Mule-Hide, and Elevate all make SBS or APP versions with granular surfaces.
- Watch for skill level: Not everyone can handle a torch properly. Also, check local regulations regarding open flame usage.
TPO Considerations
- Great for energy efficiency, especially if you have a large commercial roof or want some reflective benefits during those rare but sometimes intense summer months.
- Mule-Hide, GAF, Carlisle, and Elevate offer TPO lines with varying thicknesses.
- Consider foot traffic. TPO is relatively durable, but you might want walkway pads if people will be up there frequently.
EPDM Considerations
- A long-established option with a track record for durability.
- Carlisle, Elevate (Firestone), and Johns Manville are big names in EPDM.
- White EPDM is an option if you want a cooler surface, but black is the classic and can be beneficial in cooler climates.
Routine Inspections
No matter which system you have, schedule at least one roof inspection annually—preferably right before the rainy season kicks into high gear. If your roof is older (15+ years for torch-on or single-ply systems), consider semi-annual checks, especially after intense storms.
More Tales from Winter Rescues (Sharing the Experience)
Let me pepper in a few more stories because Vancouver’s winter is nothing if not dramatic:
- Ice Dam Drama in North Van: A homeowner had a partly sloped, partly flat roof. Snow from the pitched portion melted onto the flat part, forming ice dams at the eaves. Water backed up under the membrane and leaked into the bathroom. We added heat cables and improved the attic insulation to reduce the freeze-thaw cycle.
- Rooftop Deck Debacle in Kits: A gorgeous rooftop patio in Kitsilano included deck boards over a torch-on membrane. Over time, water collected under the boards, creating moist pockets that never dried. Mold set in, and the decking eventually rotted. We replaced the compromised boards, re-sealed the torch-on, and ensured better ventilation and spacing below the deck.
- Industrial Mishap in Delta: A TPO roof on a small factory had poorly welded seams around HVAC units. Wind-driven rain found its way in during a storm, damaging interior equipment. We re-welded each seam with a hot-air welder, added new flashing details, and advised the owner to schedule quarterly checks on rooftop penetrations.
Each of these scenarios underscores the same truth: small oversights can lead to big headaches in our winter climate. I’d prefer to handle a modest patch job or seam re-weld in the fall rather than show up mid-storm for a crisis rescue.
Transparency in Solutions: Professional vs. DIY
I’m all for empowering homeowners and building managers to handle what they can. Yet there’s no shame in calling a pro when things get complicated or potentially hazardous.
Tasks You Can Safely Handle
- Clearing debris, leaves, and small branches
- Minor patching of small tears with manufacturer-approved kits
- Replacing or re-caulking around small pipe penetrations if you have the right sealant for your membrane type
Tasks Better Left to Professionals
- Re-roofing large areas or applying new membranes
- Repairing major seam failures or large blisters
- Structural modifications (adding slope, replacing rotten decking)
- Addressing extensive mold or water damage within ceilings and walls
Humor and Heart: The Unpredictable Lower Mainland
I like to say that if you live in Metro Vancouver, you’d better have a good umbrella and a good roof—preferably both at the same time. Sometimes it feels like we experience all four seasons before lunch. The spontaneity of the weather here is part of the charm, but it also means you can’t be complacent about roof maintenance.
I’ve chatted with homeowners in Surrey who have entire “rain preparedness kits” in their garage—tarps, buckets, even a portable submersible pump. It might sound extreme, but if you’ve ever had water come cascading through your ceiling fan, you know that desperation leads to creativity.
My role, and the role of any honest roofer, is to steer you away from those frantic 3 AM scenarios by offering practical tips and robust solutions ahead of time. Trust me: it’s a lot more fun sitting inside, sipping your hot chocolate on a rainy night, knowing your roof is tight as a drum.
Detailed Considerations for Each Roofing System in Vancouver
Let’s add more nuance regarding brand offerings, local availability, and how each system might fit your preferences or property type.
Torch-On Membrane: Additional Observations
- Product Lines
- IKO Torchflex: Known for SBS-modified bitumen with various reinforcement options (fiberglass, polyester). They also have heavier cap sheets with mineral granules for better UV protection.
- CertainTeed Flintlastic: Offers multiple cap sheet color choices, which can matter if aesthetics are a concern.
- Mule-Hide Modified Bitumen: Accessible through many building supply stores; recognized for easy compatibility with Mule-Hide primers and adhesives.
- Elevate SBS/APP: Elevate has rebranded some Firestone lines. They emphasize robust elasticity and strong granule retention on the cap sheets.
- Installation Timeline
- Best done in drier, milder conditions. While it can be installed in winter (in theory), moisture entrapment is a risk if surfaces aren’t fully dry.
- Warranty Considerations
- IKO, CertainTeed, and others might offer 10-20+ year warranties, depending on the system and whether it’s a two-ply (base and cap). Keep all installation records for potential claims.
TPO: Additional Observations
- Brand Variations
- GAF TPO: Comes in multiple thicknesses—45 mil, 60 mil, 80 mil. The thicker membranes often have stronger puncture resistance.
- Mule-Hide TPO: They have membrane rolls up to 12 feet wide, reducing the number of seams on a large project.
- Carlisle SynTec: One of the pioneers in single-ply roofing, offering advanced polymer formulations.
- Elevate TPO: Known for consistent weldability, making it somewhat easier for contractors to achieve solid seams.
- Heat-Weld Equipment
- Skilled installers often carry automated welders or handheld hot-air guns with digital controls, ensuring the correct temperature range.
- Reflective Benefits
- Vancouver’s not scorching hot most of the year, but if you have a building that does run AC or you have heat-sensitive equipment inside, TPO’s reflectivity can be helpful.
EPDM: Additional Observations
- Brand Offerings
- Carlisle EPDM: The benchmark for EPDM roofing. You can get reinforced or non-reinforced versions.
- Elevate (Firestone) RubberGard: Offers various thicknesses (usually 45 mil or 60 mil) and either fully adhered or mechanically attached systems.
- Johns Manville: Has EPDM membranes that come with self-adhered options for smaller residential projects.
- Adhesive vs. Tape Seams
- Many older EPDM roofs use liquid adhesive at the seams. Newer systems often use seam tapes with primer, which is typically more reliable.
- Color Choice
- Black is the standard, but white EPDM is available if you prefer more reflectivity. However, white EPDM can be harder to source and may cost more.
Peering into the Future: Trends and Roof Tech
While torch-on, TPO, and EPDM remain the mainstream choices, it’s worth noting a few emerging trends that might influence Vancouver roofing in the next decade:
- Cool Roof Coatings
- Reflective coatings can be applied to torch-on or EPDM surfaces to reduce heat absorption. May not be a game-changer in Vancouver’s climate, but still an option.
- Green Roofs
- Vegetated roofs are gaining traction for stormwater management and insulation benefits. EPDM and TPO can both work under green roofs with proper root barriers and drainage systems.
- Roof-Integrated Solar
- As solar panel costs drop, more folks are exploring rooftop solar. This typically requires a roofing system that can handle penetrations or mounting points without compromising waterproofing.
- Drainage Innovations
- Smart drains with sensors can send alerts if water starts pooling. This might be more common in large commercial buildings, but homeowners with big flat roofs might eventually adopt it.
- Enhanced Membrane Formulations
- Manufacturers are always tweaking polymer blends to improve flexibility, puncture resistance, and seam strength. Over time, we may see TPO or EPDM products with even longer lifespans.
Additional Authority Notes: Communicating with Inspectors
If you’re doing a major roof overhaul or building a new addition, always check local requirements. Inspectors in Vancouver or surrounding cities might have specific guidelines for:
- Fire safety if you’re using torch-on near walls or eaves
- Proper drainage compliance, especially in neighborhoods prone to flooding
- Minimum insulation R-values under the membrane, for energy efficiency
Building inspectors can be allies. They’ll often point out code details that might save you headaches down the road. Keep paperwork, from the building permit (if needed) to the final sign-off, safely on file.
Final Thoughts on Building Trust and Reliability
When winter storms bear down on Vancouver, you want a dependable roof overhead—not just to keep your house dry, but to preserve your peace of mind. After witnessing countless emergencies, I can confirm that the best defense is a combination of choosing a reliable membrane system (torch-on, TPO, or EPDM) and practicing diligent maintenance.
Most roofing disasters start as small, overlooked issues. A loosened seam here, a clogged drain there—neglect them long enough, and a winter deluge can turn them into a pricey headache. By doing annual or biannual inspections and addressing little problems promptly, you’ll drastically reduce your odds of a crisis call in the middle of a downpour.
Word to the Wise and Moving Forward
The Lower Mainland’s weather can be unpredictable, but your roof doesn’t have to be. With the right materials—whether that’s IKO’s Torchflex, Mule-Hide’s TPO, or Carlisle’s EPDM—and a solid game plan for upkeep, you can enjoy the rainy season (or snowy surprises) without worrying about leaks or waterlogged ceilings.
- Plan Ahead: If your roof is nearing the end of its lifespan, don’t wait for a catastrophic leak. Schedule an inspection during a calm weather window.
- Stay Safe: If you do any DIY cleaning or patching, be mindful of slippery surfaces and always use proper fall protection.
- Keep Records: Jot down installation dates, brand names, and any repair notes. This is invaluable for warranty considerations or if you sell the property.
- Community Knowledge: Share insights with neighbors. If you discover a stellar drain guard or a method for clearing moss without damaging membranes, spread the word.
Living here means we’re all in this rainy boat together. A well-maintained roof is like a good umbrella: not something you notice every second, but something you’ll sorely miss if it fails in the middle of a downpour. So here’s hoping for many dry, cozy nights, secure under a roof you trust—no matter how wildly Vancouver’s winter storms decide to roll in.
Expanding Further on Product Details and Local Availability
Because you asked for more content on the brands and details, let’s dive deeper into each major brand’s approach to torch-on, TPO, and EPDM, especially regarding how they fit into the Vancouver area market.
IKO: Torch-On and Beyond
IKO is a Canadian-based manufacturer widely recognized for its shingles, but it also has robust offerings in torch-on membranes. Torchflex, for example, is specifically engineered for cold climates while still handling milder, wet conditions effectively. In Metro Vancouver, you can find IKO products at many roofing supply distributors.
- Torchflex Systems: Typically an SBS-modified bitumen approach, which remains flexible in cooler weather. They offer base sheets and cap sheets with mineral granules in various colors.
- Installation Considerations: Applicators must use a torch to fuse the layers. Proper torching ensures a tight seam. If you’re going the Torchflex route, ensure your installer has solid references for torch-on work.
- Warranty: Expect around 10–20 years of limited warranty coverage, depending on the system chosen. Some extended warranties are available if you combine multiple IKO components.
CertainTeed: Flintlastic Torch-On
CertainTeed is big in the asphalt shingle arena as well, but their low-slope line, Flintlastic, has grown popular in many regions, including the Pacific Northwest.
- Flintlastic Torch: Usually an SBS-modified bitumen. The cap sheet often features granules that can match or complement CertainTeed shingles, which is appealing if you have a mixed-slope roof.
- Reinforcement: These membranes typically have fiberglass or polyester reinforcement for extra dimensional stability.
- Local Distribution: Available at many roofing supply houses around Vancouver. It’s a solid contender if you like brand consistency across sloped and flat sections.
Mule-Hide: Modified Bitumen and TPO
Mule-Hide is sometimes overlooked by homeowners simply because it’s more recognized in commercial circles, but they have strong offerings for both modified bitumen torch-on and TPO systems.
- Modified Bitumen: Both APP (atactic polypropylene) and SBS lines exist. SBS is typically more flexible in colder temperatures, which suits Vancouver’s occasional cold snaps.
- TPO: Mule-Hide’s TPO has become a go-to for many contractors. It offers a range of membrane thicknesses (from 45 mil to 80 mil) and various installation options (fully adhered, mechanically attached, or ballasted).
- Brand Support: Mule-Hide’s website and reps offer quite a bit of technical support, which helps contractors get the details right, from seam welding to edge flashing.
Elevate (Formerly Firestone): Torch-On, TPO, and EPDM
Firestone Building Products is now under the Elevate brand. They cover the gamut—torch-on (modified bitumen), TPO, and EPDM. The name might have changed, but many of the product lines remain the same, just with updated labeling.
- SBS/APP Torch Membranes: Firestone had robust SBS torch sheets featuring strong tensile strength. Expect that same quality under the new Elevate label.
- UltraPly TPO: Known for a wide welding window, meaning the membrane is somewhat forgiving during installation. Good for windy or variable weather days.
- RubberGard EPDM: A mainstay in commercial roofing, recognized for durability and a wide range of thicknesses. Vancouver’s moderate weather is generally kind to EPDM, making RubberGard an attractive option for folks seeking longevity.
Brand Warranties and What They Actually Mean
Whenever we talk about brand warranties—be it IKO, CertainTeed, Mule-Hide, or Elevate—there’s a caveat: a manufacturer warranty typically covers material defects. Installation errors are usually excluded unless you have a certified installer who can offer a separate workmanship warranty.
A 20-year material warranty doesn’t guarantee 20 years free of any leaks, especially if the installation was botched. It’s crucial to:
- Hire a certified or highly experienced installer familiar with that specific membrane system.
- Follow the recommended maintenance schedule laid out by the manufacturer.
- Register your warranty promptly and keep all documentation.
Diving Deeper: Torch-On Installation Nuances
To expand even further, let’s explore some details of torch-on installation, because it’s often misunderstood:
- Base Sheet First: Typically, an installer will first apply a base sheet (often mechanically attached or adhered with cold adhesive). This acts as a foundational layer.
- Cap Sheet with Torch Application: The top layer, or cap sheet, is heated with a propane torch. The installer moves the flame along the roll, carefully melting the underside bitumen so it fuses to the base sheet.
- Granule Finish: Many cap sheets have mineral granules that protect against UV rays. They can come in different colors, from standard gray to white or even red and green.
- Overlap Details: Side laps and end laps must be properly torched and pressed down with a roller. A skilled roofer will check for bleed-out (a small bead of melted bitumen visible at the seam edge) to confirm a proper seal.
Mistakes during torch-on installation—such as inadequate heat, bridging (lifting) at corners, or scorching the membrane—can lead to leaks down the line. Proper training is paramount, which is why the brand’s official training or guidelines matter so much.
Torch-On vs. Peel-and-Stick for Vancouver
Sometimes you’ll hear about peel-and-stick membranes (like self-adhered SBS). People wonder if that’s better than torch-on. Peel-and-stick eliminates the open-flame risk but can be trickier to install in cold or damp conditions because the adhesive layer won’t bond well if the surface isn’t warm and dry.
In Vancouver’s climate, installing peel-and-stick in the rainy season can be problematic. Torch-on, while riskier in terms of open flame, can sometimes be applied in cooler temperatures if the surface is kept dry and the installer is proficient. If you’re concerned about fire, peel-and-stick could be an option, but plan your installation during a reliably dry stretch.
Extended Look at TPO Installation
For those who really want the nitty-gritty on TPO:
- Mechanically Attached: Fasteners (screws and plates) secure the membrane along the seams, which are then heat-welded. This is common in larger commercial roofs. If wind uplift is a concern, the spacing of fasteners becomes critical.
- Fully Adhered: Adhesive is applied to the substrate or insulation board, then the TPO is rolled out and pressed into place. Seam edges are still welded. This method can give a cleaner look but requires the right temperature and dryness for proper adhesion.
- Ballasted: Large river rock or pavers are placed on top of the membrane. This method is less common for small or residential roofs and requires a structure designed to handle the extra load.
The white or light grey TPO surface might show dirt or algae stains in Vancouver’s moist environment. Occasional cleaning helps maintain reflectivity (and aesthetic appeal).
EPDM Installation: More Detail
- Fully Adhered: The most common method. An adhesive is applied to both the substrate and the membrane, allowed to flash off, then the membrane is rolled on. Seam tapes or adhesives secure overlapping sections.
- Mechanically Fastened: Fasteners with large washers secure the membrane at overlaps. Seams are sealed with tape or adhesive. This is less common in small residential roofs.
- Ballasted: Similar to TPO, you can use rock or pavers. Typically reserved for large commercial roofs.
EPDM is fairly flexible, but it can be slightly more prone to shrinkage over many years, which can stress flashings around penetrations if not properly accounted for.
Vancouver-Specific Considerations for Each System
- Mild, Wet Winters: Because we don’t get -30°C spells, the risk of extreme thermal shock is lower. EPDM and TPO handle freeze-thaw decently, while torch-on’s thickness provides robust protection if installed correctly.
- Moist, Algae-Friendly Environment: White TPO can show dirt and greenish algae stains, while black EPDM might sprout moss if there’s standing debris. Torch-on membranes with granules can also develop moss if neglected. Regular cleaning goes a long way.
- Raccoons and Wildlife: In some areas, critters have been known to claw at roofing materials. A thicker torch-on might provide more resistance, but TPO and EPDM can be fortified with walkway pads or protective boards in high-traffic or wildlife-prone zones.
- Neighborhood Aesthetics: If you’re in a spot where the roof is visible from the street or neighboring apartments, you might prefer a membrane with a neat finish. Torch-on often looks like an asphalt surface with granules; TPO is bright white (sometimes available in grey or tan); EPDM is usually black but can come in white.
Community Tips: How Neighbors Share Knowledge
A surprising resource can be local community boards or online groups (e.g., Nextdoor, Facebook community pages). Vancouverites love to chat about their experiences:
- Recommendations: You’ll see people posting about which brand or system they used, how it fared in last winter’s pineapple express, or which contractor did a good job.
- Debris Solutions: Tips for gutter guards, leaf strainers, or ways to keep seagulls and crows from nesting on the roof.
- DIY Warnings: Folks often share photos of “what not to do,” which can be a great learning tool.
While it’s always best to rely on professional advice for major decisions, community anecdotes offer an on-the-ground look at how certain roofing materials stand up in real-world, local conditions.
Additional Winter Stories: Driving the Point Home
I’ve got a few more up my sleeve, just to hammer home how unpredictable things can get:
- Surrey Warehouse: A Race Against Time
A metal awning collapsed against the edge of a TPO roof during a freak windstorm. It tore a 10-foot gash right near the roof perimeter. The interior started flooding fast, jeopardizing thousands of dollars in stock. We ended up installing a large patch, carefully heat-welding new TPO over the damaged section. - Riverfront Property in New West
A torch-on roof nearing 25 years old started to fail at multiple laps. Water infiltration triggered mold growth in the insulation. We had to remove the entire top layer, re-insulate, and install a fresh two-ply torch-on system. The homeowner was surprised their old membrane had lasted so long—testament to decent maintenance, but it was clearly time. - False Creek Condo
An EPDM surface was installed over a poorly sloped deck, leaving no real drainage path. Over time, water just sat there. Algae built up, eventually finding a small seam tear. The condo owners discovered it when water began dripping through a ceiling light fixture. We re-pitched the deck slightly using tapered insulation and re-installed EPDM with better drain placements.
Transparent Solutions: Professional and DIY Approaches
I often tell clients: There’s no shame in tackling what you can safely manage. It’s your home, after all, and routine inspections can save you thousands. But once the project goes beyond superficial fixes—like seam replacements or significant membrane repairs—it’s smart to hire a roofer.
A professional can do the job faster, safer, and usually with better workmanship guarantees. If you’re the type who loves weekend DIY projects, you can certainly handle tasks like cleaning drains or sealing tiny cracks with manufacturer-approved products—just be sure to read the instructions carefully and mind your footing.
Humor and Heart: The Realities of West Coast Living
Let’s face it, we love to complain about the rain, but we also brag about how green everything is, how we can see the mountains from our backyard, and how the mild climate allows for relatively comfortable winters. In Vancouver, your roof is going to see more water than many other parts of Canada. It’s a wet place—and that’s what gives it its charm (and its mold, and its moss, and a hundred other moisture-related quirks).
Sometimes I laugh with homeowners who wonder if installing an “ark” might be more appropriate than a standard roof. But jokes aside, the best strategy is to embrace the reality of constant moisture and do everything possible to keep your roof prepared for it.
Additional Maintenance Programs and Checklists
If you own or manage multiple properties or a strata complex, consider a maintenance program:
- Biannual Inspections: One in early fall before the rainy season, and one in early spring after the worst storms.
- Cleaning Schedule: Monthly or bimonthly gutter checks in the fall, especially if the property is surrounded by tall trees.
- Record-Keeping: Keep a digital or physical log of each inspection, noting down the date, who performed it, any findings, and any repairs done.
- Budgeting for Replacement: If your roof is creeping toward 15+ years for torch-on or single-ply systems, start setting aside funds for a potential re-roof. Don’t wait until it’s an emergency.
An organized approach not only saves money but also helps coordinate with insurance requirements should a claim ever be necessary.
A Big Emphasis on Flashing
Flashing is the unsung hero of any roof system, more so on low slopes. You can have the best membrane from a leading brand, but if the flashing around your parapets, skylights, chimneys, or drains is poorly executed, water will find a way.
- Material Compatibility: For torch-on, you might use an SBS-compatible flashing membrane. For TPO, custom-formed accessories or coated metal flashings are common. EPDM typically uses cured or uncured flashing tapes at penetrations.
- Proper Overlap: Flashing should extend well up any vertical surface and be sealed at the top edge with the right termination bar or counter-flashing.
- Regular Checks: Flashing can degrade due to UV exposure or mechanical damage. Keep an eye on any cracks or separation from the main membrane.
Final Recap and Encouragement
We’ve covered a vast amount of territory: from Vancouver’s unique climate challenges to brand-specific membranes (IKO, CertainTeed, Mule-Hide, Elevate, GAF, Carlisle, Johns Manville), from building code basics to real-life horror stories. The key points to remember:
- All Membranes Can Fail If Neglected: Torch-on, TPO, EPDM—each can shine or flop, depending on installation quality and maintenance.
- Vancouver’s Weather Is Tough: Lots of rain, occasional snow, freeze-thaw cycles, and windy storms. A robust roofing approach is essential.
- Brands Matter, but Installation Matters More: A name-brand membrane won’t save you if the contractor is cutting corners or if you never inspect your roof.
- DIY Within Limits: Clear debris, patch tiny holes, check drains. For significant repairs or installation, call an expert.
A well-maintained roof is your home’s or building’s first line of defense against the elements. It’s easy to overlook, but when the weather turns nasty, you’ll be glad you invested the time and effort to keep it in good shape.
Wherever you reside—be it the bustling core of Vancouver, the sprawling neighborhoods of Surrey, or the riverside areas in Delta—take a few steps to safeguard your roof before the next big winter storm arrives. A small investment of time and resources now can save you from some major heartache (and soaked drywall) later on.
Stay safe, stay dry, and here’s wishing you smooth sailing through every rainy season that comes our way!
Our Roofing Blog


Have more questions about roofing?
Check out our FAQs or give us a call today to speak to an expert roofer in Vancouver Lower Mainland, BC. We're here to help our neighbours make educated decisions about their roof. For our team, we value helping clients save money while making their roofs last.
