The Roof Installation Process in Vancouver: A Roofer's Perspective
A no-nonsense, in-depth guide to roof installation in Vancouver, breaking down every step—from material choices to final inspection
Alright, let's talk about roofs. Not just any roofs—your roof. The one that stands between you and the relentless Vancouver rain, the summer sun, and the occasional windstorm that makes you question your life choices. I'm not here to sell you anything. I'm here to give you the absolute, unfiltered truth about the roof installation process—what goes into it, what to expect, and how to ensure you don't get stuck with a lemon of a roof.
Understanding the Big Picture
If you're reading this, chances are you're either building a new home, replacing an old roof, or just curious (in which case, I respect your commitment to learning about roofs). Either way, roofing is one of those things that you don't think about until you have to. And when you have to, it feels like diving into an ocean of information that nobody prepared you for. We've been installing roofs in Vancouver and the surrounding communities for years. We know the quirks of the weather (hello, endless rain), the impact of local building codes, and the tiny details that make the difference between a roof that lasts and one that needs fixing too soon. So, let's break it down.
Step 1: Planning & Preparation (a.k.a. The Homework Phase)
Before a shingle goes up, let's discuss something most people overlook: planning. And no, I don't mean picking a color and hoping for the best. I mean real preparation—the kind that ensures your roof lasts for decades without turning into a nightmare. Have you ever tried to build IKEA furniture without instructions? You get halfway through, realize you missed a step, and suddenly that bookshelf looks like modern art. A roof isn't much different. You're setting yourself up for a mess if you don't plan properly. So, let's do this right.
Choosing the Right Materials
This is Vancouver. And in Vancouver (plus Surrey, Burnaby, Delta, and everywhere else nearby), your roof has one non-negotiable job: keeping water out. It sounds simple, but in reality, it's anything but. You've got choices regarding materials, and each has its own benefits and drawbacks. The key is picking the right one for your home, your budget, and how much maintenance you will commit to.
Asphalt Shingles: The Trusty Workhorse
For most homeowners, asphalt shingles are the go-to option. They're affordable, durable, and look good. They handle rain well, come in different styles, and last anywhere from 20 to 40 years. Plus, if one gets damaged, you can replace it without hassle. I had a customer in Burnaby; let's call him Dave. He called me up, panicked about roofing choices. "Harman," he said, "I just want something that works." We went with a solid architectural asphalt shingle, and now, years later, he still texts me when it rains: "Bone dry, my friend. Bone dry."
Metal Roofing: The "Forget About It" Option
If you're in the camp of "I never want to think about my roof again," metal roofing might be your best bet. It's durable, sheds water like a dream, and lasts 50+ years. It's also fire-resistant, energy-efficient, and can handle extreme weather. It's not the cheapest option upfront, but in the long run, it might save you money by eliminating the need for a replacement. Picture this: A guy in Delta had a metal roof installed 30 years ago. The thing still looks brand new. Meanwhile, his neighbors have all replaced their roofs twice. That's the difference.
Cedar Shakes: Beautiful but High-maintenance
If you want that classic, natural look, cedar shakes are stunning. No argument there. They add character, boost curb appeal, and have a warmth that asphalt shingles don't match. But here's the thing—Vancouver's wet climate is not their best friend. They'll age fast if you don't stay on top of maintenance (cleaning, sealing, and occasional repairs). I had a homeowner in Surrey who was absolutely set on cedar shakes. It was a gorgeous house, but he didn't want the upkeep. Two years in, the shakes started looking weathered. By year five, he was calling me for a new roof. Lesson learned: Cedar shakes are not a "set it and forget it" option.
Synthetic Roofing: The Wild Card
I get it—there’s something about the look of a cedar roof that feels right in the Lower Mainland. Maybe it reminds us of all the big trees we grew up around, the ones lining the backroads of Surrey or the hiking trails out in Deep Cove. And slate? That’s the kind of old-world charm you see on some of the heritage homes in Vancouver, the kind that makes you stop and appreciate craftsmanship. But as much as we love those looks, let’s be honest—keeping them up is like having a high-maintenance pet. You love it, but it demands constant attention, and if you ignore it for too long, things get expensive. Now, this is where the new synthetic roofing options step in. They’re made to mimic the look of cedar and slate, but they’re built to handle the temper tantrums our weather throws at them. Do you want that classic West Coast aesthetic without the endless upkeep? This is how you do it.
Cedar-Style Synthetic Roofing: The Look Without the Headache
Natural cedar is gorgeous when it’s fresh, but give it a few years in our damp climate, and you’re dealing with moss, algae, and warping. I’ve replaced more rotting cedar roofs than I can count—whole sections just eaten away by moisture, despite homeowners doing their best to keep up. One job in Delta really sticks with me: the roof was only about 12 years old, and sections of it had gone so soft you could poke a finger through them. The homeowner had spent thousands on maintenance over the years, but in the end, the rot won. We swapped it for a synthetic shake that looked precisely like fresh-cut cedar but had none of the water absorption issues.
These synthetic options? They’re made from composite materials that don’t absorb moisture and don’t curl or split like real wood. And moss? It might try to grow but won’t sink its teeth similarly. You’re not out there every spring with a pressure washer, hoping your roof survives another year. Plus, they come in fire-resistant versions, which is a big deal in the summers we’ve been having. And here’s the kicker—you still get that weathered cedar look over time. Many people worry that synthetic means it’ll always look “too new,” but the manufacturers have figured that out. They design them to age naturally, so they keep that West Coast charm without structural nightmares.
Synthetic Slate: Because Real Slate is Basically Lifting Weights for Your House
Now, slate is another classic material that oozes quality. It’s like the architectural equivalent of an old-school Land Rover—sturdy, timeless, but if something goes wrong, it’s a whole production to fix. And heavy? You bet. I worked on a place in Vancouver where the homeowner wanted to replace an old slate roof, but here’s the thing—his house couldn’t handle the weight anymore. The structure had shifted over time, and reinforcing it to support a new slate would have been a massive, expensive undertaking. Instead, we put in a synthetic slate that looked the part but weighed a fraction of the real thing. No extra reinforcement, no crazy installation costs, and still that high-end, historic look.
A significant advantage of synthetic slate is impact resistance. Real slate can crack under pressure—literally. I’ve seen a single falling branch take out multiple tiles; replacing them is a pain. You can’t just swap in any old piece; it has to be cut and fitted correctly, and finding a perfect match isn’t always easy. Synthetic slate, though? It’s built to take a hit. Whether it’s a tree branch or a golf ball from your neighbor’s backyard driving range (yes, this has happened more than once), you’re not constantly stressing about repairs.
Ventilation & Insulation Matter (Like peanut butter and jam)
People think roofing is just about keeping the rain out, but if your attic isn't breathing properly, your roof will have a short and unhappy life. Poor ventilation is a silent killer. It leads to trapped heat, moisture buildup, and—worst of all—mold. Think of it like this: If your attic is too hot, your shingles bake from underneath, aging faster than they should. If there's too much moisture, mold and mildew can take hold, leading to structural damage and poor air quality inside your home. Imagine wearing a winter coat in July and never being allowed to take it off. That's your attic without ventilation.
Miserable, right? Proper airflow keeps things cool in the summer and dry in the winter.
Ventilation is crucial, especially in places like Surrey and Langley, where temperatures swing more than downtown Vancouver. You need a system that lets air flow naturally, keeping your attic cool in summer and dry in winter. And while we're at it, let's talk insulation. If you're paying to heat your home in the winter and cool it in the summer, but all that air is escaping through your roof, you're throwing money away. A well-insulated attic keeps your home comfortable, lowers energy bills, and extends the life of your roof.
I once worked on a home in Burnaby where the owner complained about high energy bills. It turned out his attic was a heat trap—no insulation, no ventilation, just a furnace-like void that was cooking his house in summer and freezing it in winter. We fixed it up, and now his bills are lower, and his house stays comfortable year-round.
The Importance of a Solid Roofing Plan
The best roofs aren't just slapped together. They're carefully planned. That means making sure you have the right materials, ventilation, insulation, and installation process. If you skip this step and rush into the project, you might regret it a few years later. A good roof should be something you don't have to think about—something that works. And that starts with doing your homework before the first nail goes in. Roofing is like making a great cup of coffee. If you just dump in some grounds, pour in hot water, and hope for the best, you're going to end up with a bitter mess. But if you take the time to pick good beans, get the right grind size, and brew it just right—chef's kiss—it's perfect. The same goes for a roof. Do it right from the start, and you won't be dealing with leaks and stress down the road.
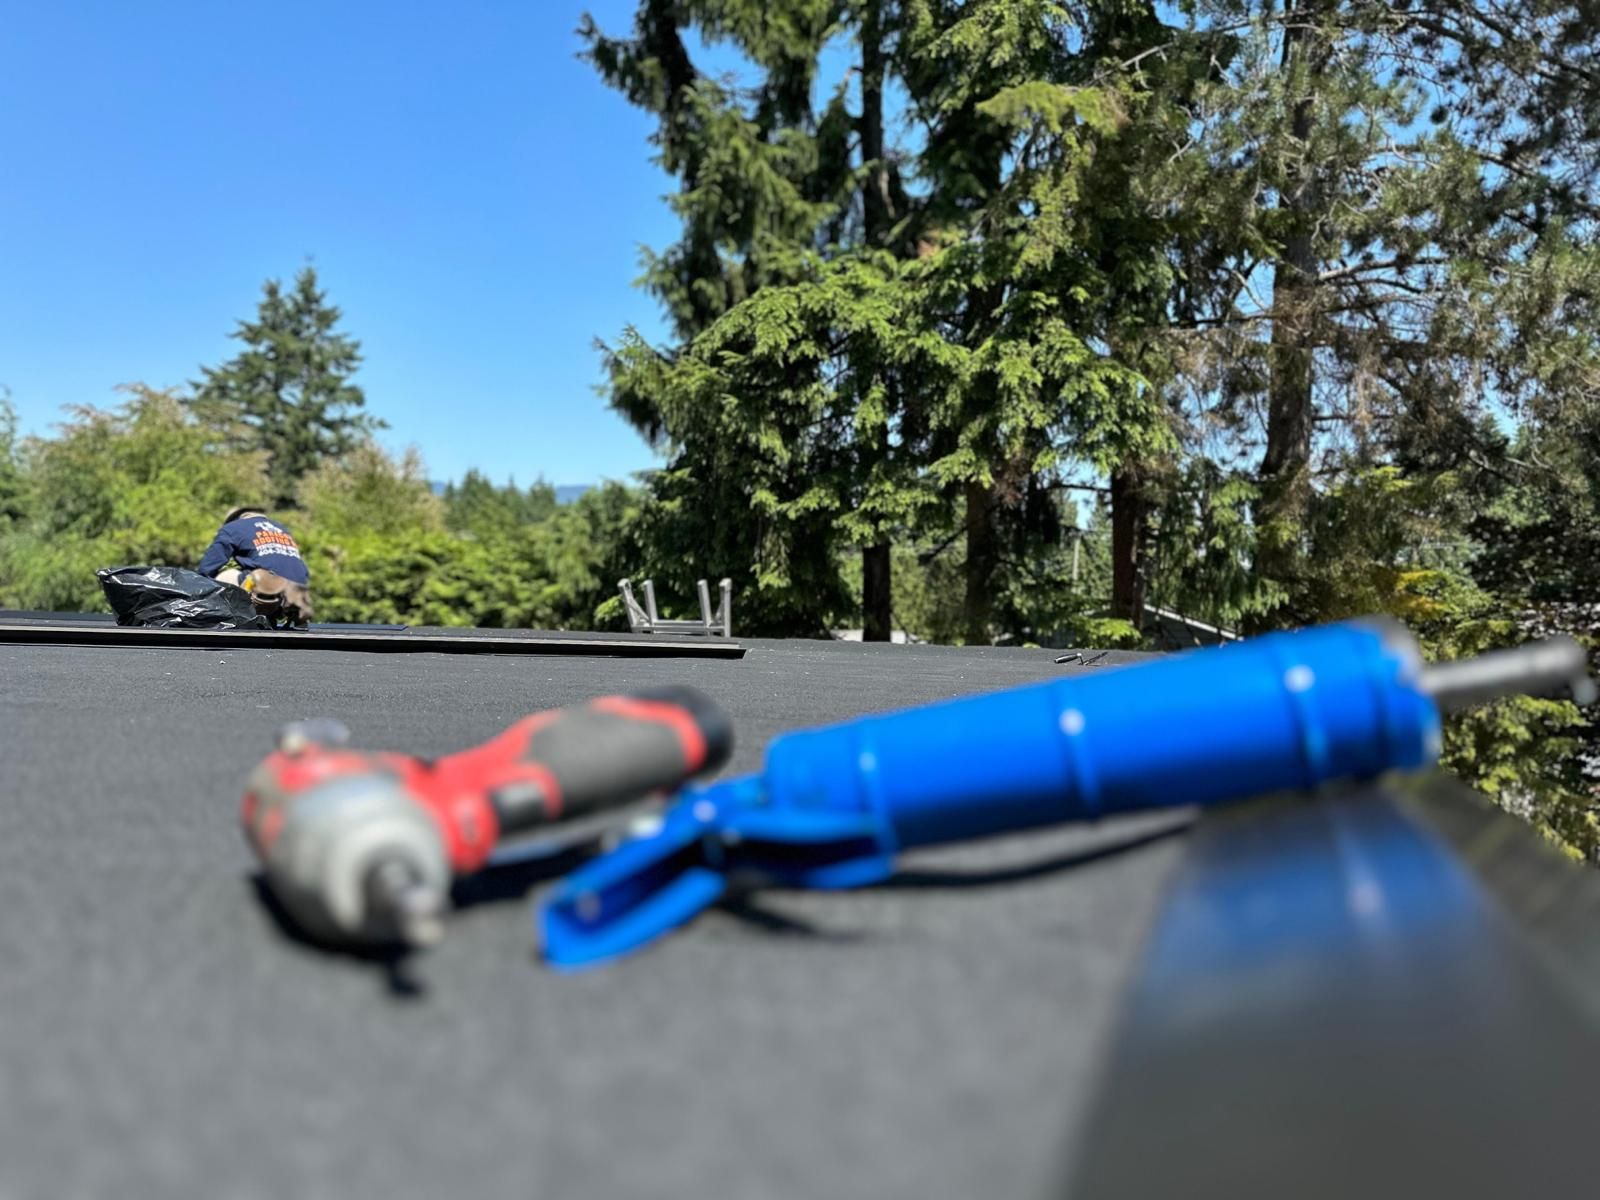
Step 2: Removing the Old Roof (a.k.a. The Messy Part)
Let's talk about the part nobody really enjoys—but it's gotta be done. If you're replacing your roof, we can't just slap new shingles on top of the old ones and call it a day (well, some roofers do, but that's another story). The right way to do it is to strip everything down to the decking, check what's happening underneath, and ensure your new roof has a solid foundation. And yes, this part gets loud. It gets messy. If you're at home while we're working, you might find yourself dodging vibrations that make your coffee dance on the counter like it's auditioning for Canada's Got Talent. The neighbors? They might give your house the side-eye while wondering what's going on over there. But hey, it's better to have a few noisy days than a roof that leaks in the next big Vancouver downpour, right?
The Tear-Off Process
Picture this: your roof has been sitting there for years, battling the elements, taking hit after hit from the rain, wind, and (on rare occasions) that one week of Vancouver snow we all collectively forget how to drive in. Over time, shingles break down, layers weaken, and moisture sneaks in. So, first things first—we carefully rip off everything: shingles, underlayment, and whatever mystery material was patched in over the years. There's a rhythm to it. We start from the top and work our way down, section by section, using specialized roofing shovels and tools to pry everything up. Sometimes, we find surprises—old tar paper that's barely holding together, moss that's practically built its own ecosystem, or, in the case of one house in Delta, a wasp nest the size of a basketball (don't worry, we called in the professionals for that one).
All the debris goes straight into the bin—no cutting corners. We tarp off the surrounding areas so your garden doesn't look like it hosted a shingle explosion. We also make sure any loose nails or sharp objects are picked up with industrial magnets so no one ends up stepping on a roofing souvenir later.
Inspecting the Decking (The Wooden Foundation Beneath It All)
Once everything's stripped down, we get to the real heart of your roof—the decking. This is the plywood base that everything else sits on; trust me, this is the moment of truth. Sometimes, we find strong, solid wood that's good to go. Other times? Not so much. There have been jobs where we pulled off the shingles and found decking so soft you could press a finger into it like a sponge. That's a big problem. Weak decking means your new roof won't have the proper support, and that's an issue waiting to happen.
Take that one house in Surrey—we started tearing things off and found sections of decking that looked fine at first, but once we got a closer look, it was clear water had been sneaking in for years. Some of the plywood was borderline compost at that point. We replaced it right then and there because the last thing you want is to build a brand-new roof on top of a weak base. It's like trying to put down new flooring over a rotted subfloor—sooner or later, it will cave.
The Weather Factor: Timing is Everything
If you're in the Lower Mainland, trusting the weather forecast is basically a gamble. They'll call for a "20% chance of rain," and next thing you know, your backyard's a lake. That's why we plan ahead. We only tear off as much of the roof as we can realistically replace within the same day or at least make it watertight. If the forecast is looking sketchy, we're not just going to hope for the best—we tarp everything up and wait for a better window. No one wants their house exposed to a surprise rainstorm halfway through the job.
One time in Burnaby, we had just finished stripping a section of the roof when the sky did that thing: It went from sunny to full-blown downpour in about three minutes. We moved fast, covered everything, and double-checked all edges to ensure no single drop got in. The homeowner was initially nervous, but when we pulled the tarp off the next morning, everything was Bone dry. Crisis averted.
Noise, Vibes, and What to Expect
Look, we know this part of the process isn't exactly peaceful. There's hammering, scraping, and the occasional "What the!!" when we uncover something unexpected. If you work from home, noise-canceling headphones will be your best friend. If you have kids or pets who don't love loud sounds, it might be worth planning a little outing during the peak of the tear-off. Ultimately, though, it's all about ensuring your new roof starts on a solid, healthy foundation. Once this part's done, the rest of the process is smoother, quieter, and (let's be honest) a lot more satisfying to watch.
And remember, as much as your neighbors might raise an eyebrow at the temporary chaos, they'll be the first ones asking for our number when they see how clean and sturdy your new roof looks.
Next up? Prepping for the new roof. That's where things start looking really good.
Step 3: Waterproofing & Underlayment (The Unsung Heroes)
Alright, this is where things get real. Before we even think about putting on shingles, metal panels, or whatever roofing material you've chosen, we've got to prep the surface. Think of it like putting on a rain jacket before stepping into a Vancouver downpour—you wouldn't just rely on a sweater, right? That's what underlayment is for. It's your roof's first line of defense against moisture, wind, and whatever else the Lower Mainland throws. And if you think Vancouver's rain is just light drizzles all year, you probably don't live here. We're talking days, sometimes weeks, of relentless rain. And when the rain finally stops? That's when the frost and ice sneak in. The last thing you want is water sneaking into your home because someone thought they could cut corners on underlayment. We've seen it happen. It's not pretty.
Felt Paper – Old School, But Effective
Let's start with the classic—felt paper. This stuff has been around forever, and for good reason. It's like that old truck that just keeps running no matter what. Made from asphalt-saturated paper, felt paper creates a protective barrier between your roof deck and the elements. It's simple, affordable, and does the job. But here's the thing—if you live in a place like Delta, where moisture loves to linger, you can absorb water over time. That means if your shingles aren't installed right away, or if a surprise rainstorm shows up mid-job (because, of course, it would), the felt can wrinkle or even tear. We've had days where we're rolling this stuff out, and suddenly, a wind gust of the Fraser River tries to turn it into a makeshift parachute.
Not ideal. So, while it's still used, there are better options.
Synthetic Underlayment – The Workhorse
Now, this is where modern roofing gets serious. Synthetic underlayment is the equivalent of upgrading from a rain poncho to a top-tier GORE-TEX shell. It's lighter, stronger, and much more tearing resistant, which is a big deal when working in those gusty Surrey afternoons.
Last winter, we had a job in South Surrey, and the wind was relentless. We were up on a steep roof, and the old felt underlayment that was initially installed had started to rip away, leaving exposed sections that had been soaking up moisture. We replaced it with synthetic, and despite some severe wind coming off Boundary Bay, it stayed put. It's also more slip-resistant, which is a huge plus when working on a wet roof—no one wants to be sliding around like they're at a Richmond ice rink.
For homeowners, the benefit is clear: synthetic lasts longer, protects better, and isn't as prone to breaking down over time. It's a bit more expensive but worth every penny considering how much it saves in potential repairs.
Ice & Water Shield – The MVP for Vancouver Roofs
If synthetic underlayment is the rain jacket, Ice & Water Shield is that extra waterproof layer you throw on when a Pineapple Express rolls in. This self-adhering membrane creates an airtight, watertight seal, preventing leaks in your roof's most vulnerable spots—like valleys, edges, and around vents and chimneys. Ever driven through North Van in the winter and seen those massive icicles hanging off roofs? That's ice damming, and while we don't get hit as hard as the Prairies, it's still an issue here, especially in shaded areas where meltwater refreezes. One of the worst leaks we ever saw was on a home in Burnaby, where an ice dam had backed water up under the shingles, completely rotting out the plywood underneath. The homeowners had no clue until they noticed a brown water stain creeping across their ceiling.
That's why we use Ice & Water Shield in key areas—because once water gets in, it doesn't just go away. It finds the lowest point and causes damage you might not notice for months. And by then? It's a much bigger, more expensive fix.
Why Skipping Underlayment is a Disaster Waiting to Happen
Look, we get it—no one gets excited about underlayment. It's like the foundation of a house; you don't see it, you don't think about it, but if it's not done right, everything else suffers.
We once had a homeowner in Vancouver who called us because their relatively new roof was leaking. It turns out that the previous roofer had skipped underlayment entirely, thinking that "it wasn't necessary." The result? Water had seeped into the attic, causing mold and damage that cost thousands to repair. That's the kind of shortcut that turns a simple roofing job into a nightmare.
Bottom Line
If you take nothing else away from this, remember this: underlayment is non-negotiable. Whether felt, synthetic, or Ice & Water Shield, every layer is critical in protecting your home from leaks, mold, and costly repairs. Roofing isn't just about what you see on the surface. The actual protection happens underneath. And in a place like Vancouver, where rain is practically a season, you don't want to leave anything to chance. So next time you hear someone talk about underlayment like it's just an extra step, tell them this: it's not extra—it's essential. And when the next storm rolls in, you'll be glad you took it seriously.
Step 4: Installing the New Roof (Where the Magic Happens)
Alright, this is the part where things really start coming together. If the teardown was the mess and prep was the patience, this is the payoff. We're putting on the new roof, and let me tell you—there's something deeply satisfying about watching a fresh, clean roof take shape over a home. It's like watching a fresh snowfall on Grouse Mountain, but it keeps you dry.
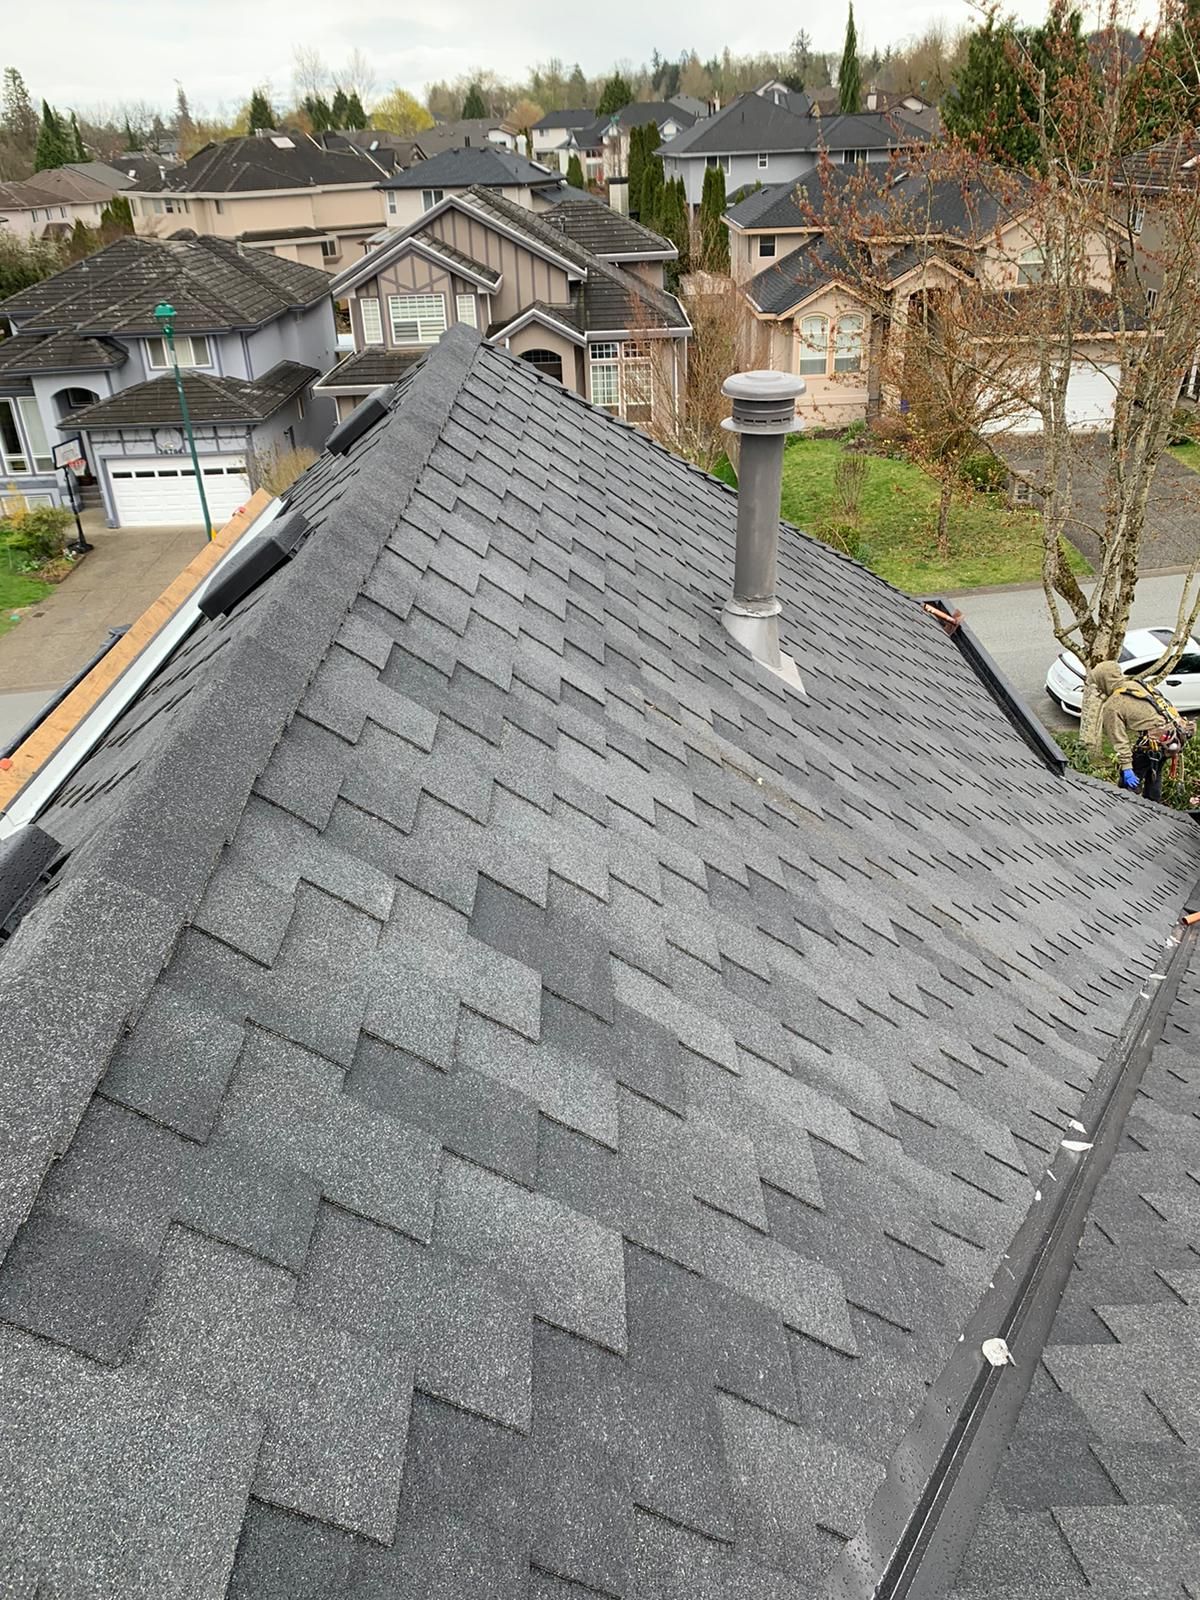
Shingle Placement: Like Stacking Pancakes, but Way More Important
For most roofs in the Lower Mainland, shingles are the go-to. And there's a method to lay them down. We start from the bottom and work our way up—like layering bricks, except these are your home's armor against rain, wind, and the occasional curious raccoon. Each row overlaps the one below it, creating a barrier water can't penetrate. But it's not just about throwing them on and calling it a day. They must be appropriately staggered so the seams aren't lined up like a poorly built Jenga tower. We follow a pattern that ensures no direct pathway for water to find its way inside. Because trust me, water will try.
I remember one time in Burnaby, we replaced an older roof where the previous installer had just stacked shingles in straight lines. You could see little channels where water had found its way over the years. The homeowner thought they had a plumbing leak—it turned out their shingles were basically guiding rain straight into their attic.
So yeah, the staggering pattern? It's everything.
Flashing Installation: The Unsung Hero of Roofing
Flashing is one of those things that nobody notices when it's done right, but everyone sure as hell notices when it's done wrong.
It's the metal we install around chimneys, vents, skylights, and anywhere else water might try to sneak in. Without flashing, your roof might look great for a few months—until you find out you've got an uninvited indoor waterfall in your living room. We ensure the flashing is installed correctly, tucked under shingles where needed, and sealed tight. I've seen some absolute horror shows in Surrey where someone used caulking instead of flashing. Caulking! That's like holding back a flood with a roll of paper towels. Water finds a way through eventually, and by the time you notice it inside, the damage is already done.
One time, in Richmond, we were called in for a "minor leak." It turned out that the original flashing had been installed backwards around the chimney, so instead of directing water away, it was literally funneling rain straight into the attic. We had to strip back part of the roof and redo it all. The homeowner was shocked that something so small could cause so much damage. Lesson learned: Flashing is critical.
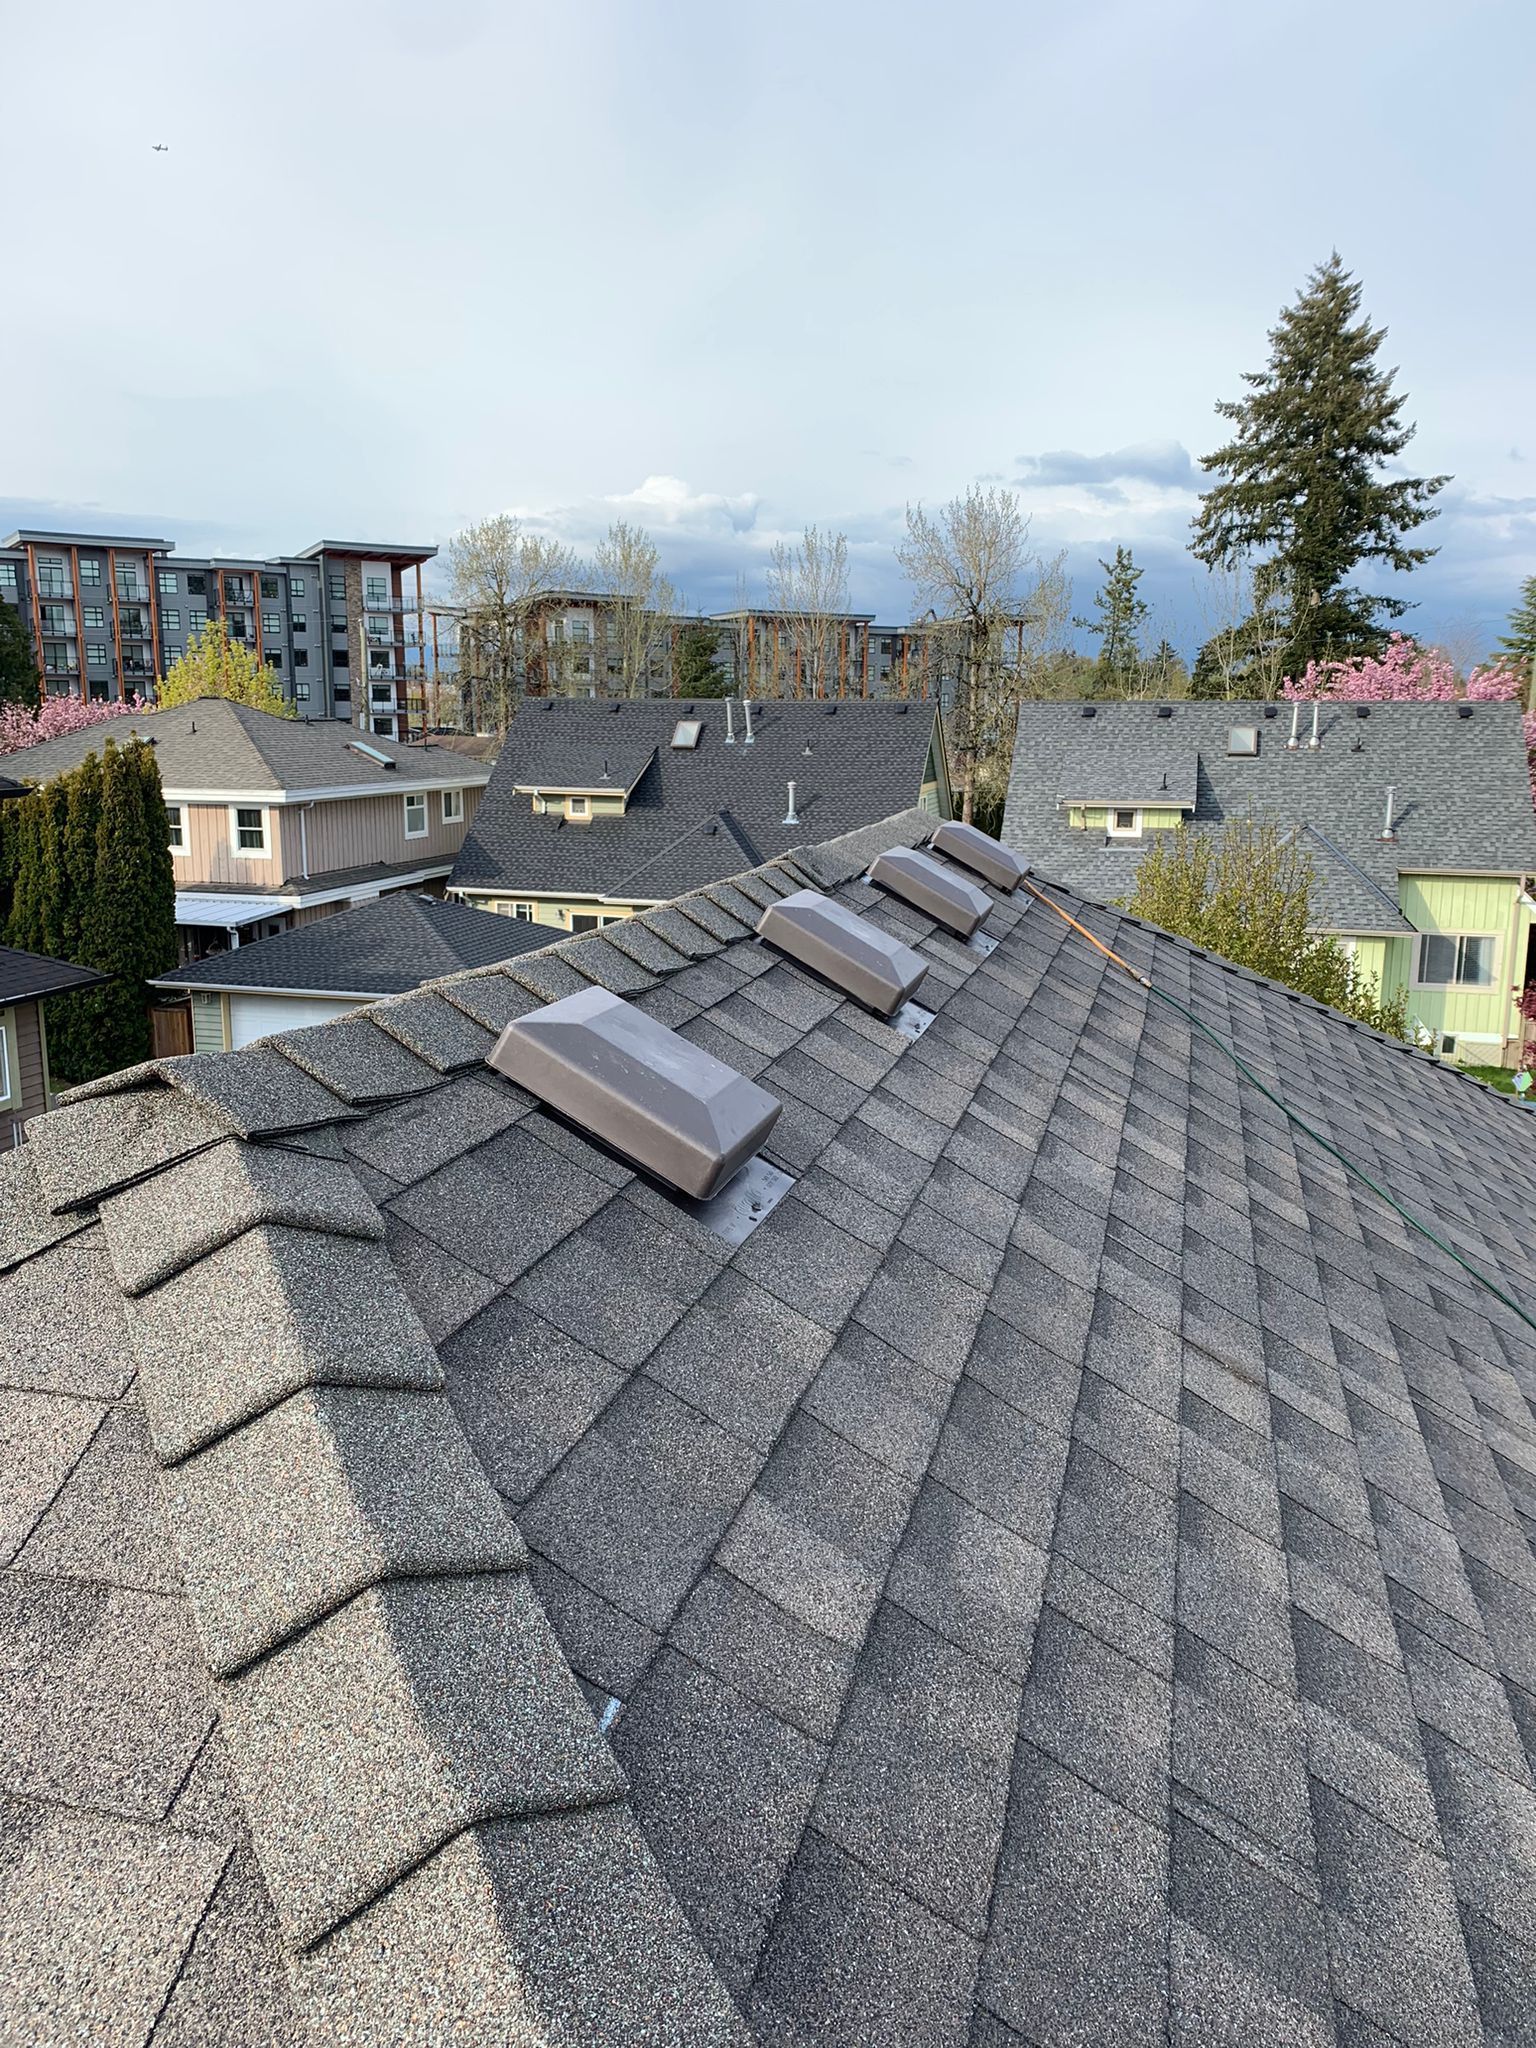
Ridge Caps & Finishing Touches: The Cherry on Top
This is where we make sure everything is locked in tight. The ridge caps are the last piece of the puzzle, sitting at the very peak of your roof like the final stroke of a masterpiece. They don't just look nice; they also seal off the top where the two slopes of your roof meet. This is a central weak point if it's not done right—like a badly zipped rain jacket. We use special ridge cap shingles designed for this job, ensuring they're secure and properly vented if necessary. And then, we step back and admire the work.
Adapting to Vancouver Weather: Because Rain Waits for No One
Now, if you live anywhere in Metro Vancouver, you already know that our weather is unpredictable at best and utterly ridiculous at worst. I've seen it rain in just one backyard while the sun shines on the house next door. That's why we always check the forecast and adjust. If we're roofing in Coquitlam and see that three days of rain are incoming, we don't just hope for the best—we tarp, seal, and work around it. And if the sky decides to mess with us anyway, we've got emergency plans in place.
Step 5: Clean-Up & Final Inspection (Making Sure It's Done Right)
Nobody wants to be out mowing their lawn in a week and suddenly hear the ping of a nail hitting the mower blade. It's the roofing equivalent of stepping on a LEGO in the dark. A solid roofing crew—like ours—takes clean-up seriously. We don't just do a quick glance and call it a day. We go over your yard with a magnetic sweeper, picking up stray nails that might've tried to escape. We clear debris, double-check flower beds, and make sure your driveway isn't hiding anything sharp. It's about respect—your home isn't a construction site when we're done.
I remember a job in Surrey last fall where we replaced a roof in a cul-de-sac. The homeowner had a golden retriever named Max, who loved rolling around on the grass. The last thing we wanted was for him to find a nail the hard way, so we did a triple sweep and even let the homeowner walk around with us for peace of mind. That's just how it should be done.
After the clean-up, we do one final walkthrough. We check every shingle, flashing, and ridge to ensure everything is installed correctly. At the end of the day, this isn't just about putting shingles on a house—it's about protecting your home, your investment, and the people inside it. We take that seriously.
Final Thoughts: What You Should Expect After Installation
A new roof isn't just a bunch of shingles nailed down. It's a system. And like any system, there are a few things to remember after installation.
First 24-48 Hours: Granule Loss is Normal
New shingles come with a protective layer of granules, like a new jacket might have a few extra threads that come loose after wearing it a couple of times. If you see some granules in your gutters or downspouts, don't panic. That's just the extra bits shaking off. It's like when the first fall rain hits, and all the dust and pollen gets washed off your car. There is nothing to worry about.
First Few Weeks: Any Lingering Moisture Will Dry Out
If we had to rip off an old roof, there's a chance some moisture was trapped underneath. Vancouver's weather doesn't exactly make things easy—we once pulled off an old Burnaby roof hiding damp plywood underneath. Looked fine on the outside, but underneath? Like a wet sponge. Luckily, we caught it in time and replaced it. If any moisture was trapped under your old roof, the new ventilation system will help it dry out over the next couple of weeks. That's part of why proper venting is so important.
Ongoing Maintenance: Check Your Roof Annually
Think of your roof like your car. You wouldn't go years without checking the oil. Same thing here. Especially in places like Surrey or Delta, where the mix of rain, wind, and tree debris can do a number on your shingles.
At least once a year, especially before and after winter, take a quick look at your roof. Check for:
Loose or missing shingles
Clogged gutters
Signs of moss or algae
Any spots where water seems to be pooling
If you're not comfortable getting up there, no worries. Grab a pair of binoculars and take a look from the ground. If anything looks off, call someone who knows what they're doing. (And no, that doesn't mean your buddy with a ladder and a six-pack.)
I had a homeowner in Delta call me last year because they noticed a dark patch on their ceiling after a bad storm. It turned out that a small branch had punctured a shingle right near the ridge. One tiny hole was letting in just enough water to cause problems. A quick patch job saved them from a bigger headache down the road.
And That's It. No Sales Pitch, Just the Real Breakdown.
You shouldn't rush a new roof. It's a big investment, and it should be done right the first time. If you're thinking about it, take your time, ask questions, and make sure you're working with people who actually care about the job—not just getting it done, but getting it done right.
At the end of the day, your roof is your home's first line of defense. It keeps the rain out, the heat in, and the structure solid. If it's built properly, you won't have to consider it much. And that's the goal.
So, stay dry out there, Vancouver. And if you ever have questions, you know where to find us.
Our Roofing Blog

Have more questions about roofing?
Check out our FAQs or give us a call today to speak to an expert roofer in Vancouver Lower Mainland, BC. We're here to help our neighbours make educated decisions about their roof. For our team, we value helping clients save money while making their roofs last.
